January 30, 2014
 It’s been really exciting to see what started as a funny little side project, turn into something much bigger than I ever expected it to be. The Gwyneth Made Me Do It IG feed now has almost 4500 followers, and the community over there has challenged and encouraged me to cook more, research more and change more than I ever imagined. Many of the things I cook are still from It’s All Good, but many are recipes I find online, or old favorites I tweak to make more healthy. And the majority of the time I make food on the fly, with no recipe at all. Friends over on GMMDI are constantly asking for recipes, and the main thing that always holds me back from posting more of them over here, is I am really terrible at food photography. But not only that, it’s not something I’ve ever really taken very seriously because it just seemed like another thing to learn, and so I instead rushed through shots and posted some pretty terrible photos. Just look at this photo of the healthy baked chicken nuggets. One day I’ll go back and re-shoot that, because it’s a gem of a recipe and the photos do it absolutely no justice.
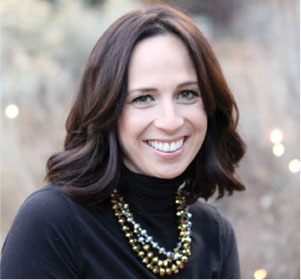
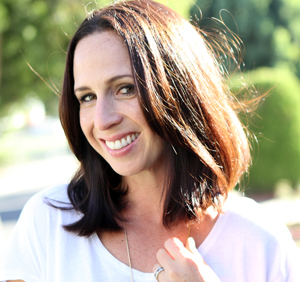
So anyhow, when I saw that Alt was offering a food photography and styling class, I rushed to get in line that morning because attendance was limited. The class was led by Lindsey Johnson of Cafe Johnsonia (Lindsay also writes for Babble), and Joy Uyeno of Frockfiles. Not only were these two ladies completely approachable and lacked any bit of pretentiousness when it came to photography, they shared real tips that I could easily take away and replicate at home. Let me share with you, the tips I found to be the most helpful.
Lighting: Shoot with natural light as much as possible. Unless we’re lucky enough to live in an amazing loft or house with very large windows, this will most likely mean we need to move our food to where the light is. If that’s in your bathroom, then set up camp there. If it’s just next to a nice window in your bedroom, that that’s where you and your food travels. You can shoot on the floor if need be, to get the most beneficial angle and light, or they used one of those waiter stands used to serve food. I don’t have one of those at home, but I did remember I had an old outdoor serving tray with an attached stand that I had thrifted years ago, so have now been using that. It’s the perfect height to let me stand over the food. Get creative and think outside the box. Joy also used a flash attachment for when natural light isn’t available, and it utilized her flash by bouncing it off the attachment and towards the ceiling. I don’t know, it looked complicated so I didn’t’ pay too much attention to that. I figure I’ll just try and do my shooting during the day.
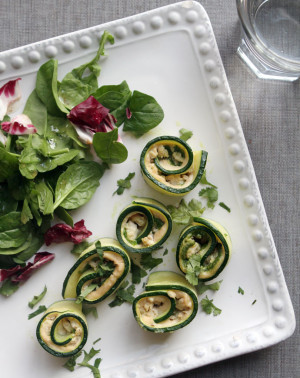
 Props: I’ve always hesitated to buy props because it seemed like a waste of money and figured it would just be more junk to clutter my house, but I realized I only need a few key essentials. First, I needed some better background surfaces to shoot my food on. Everything in my house is shiny, which reflects light very strangely. Look at my shiny black counter tops (they were here when we bought the house), my coffee table is white lacquer, and even our dining room table has a semi-gloss finish. Joy recommended black foam board to get really dark and moody shots, very similar to Smitten Kitchen or even Kinfolk, and it works like an absolute charm. Lindsay made a dual sided prop which was a framed piece of black slate on one side (chalkboard material actually, not sure if that’s technically slate), and a piece of lightly white-washed press board on the other. It wasn’t too large and light enough to transport around, and I figure I can easily store a piece like that in my garage, slid up against our fridge so it wouldn’t take up any extra space. The salad is shot on the whitewashed side, and the raspberry tart is shot on the black foam board. Amazing, right? Gives the photo a warmth and texture I didn’t even realize was missing.
I remember Todd & Diane once shared a photo of their enormous prop room filled to the brim with dishes, linens, etc. You don’t have to go that crazy to get some pretty items that will elevate your photos. Lindsay thrifted a set of antique silverware for $10. Things like wooden pepper grinders and oil & vinegar glass bottles make lovely items to add to photos, and even better, you actually use those things in real life. We have an ugly plastic black pepper mill from Costco that I never include in shots because it just looks ugly. So I’ll definitely be picking up a reusable mill that will look good in shots, and is reusable! Oh! And dish towels. I have real world dish towels that I use to sop up messes, but will pick up a few pretty and basic ones I’ll reserve for my food photos that I can toss in shots.
 Styling: A few things to share here. First, start with pretty food. When using fresh greens and fruits, pick out the ones that look wilted. Build upon dishes to give them depth and height. When Lindsay built the salad in the shot above, she carefully placed almost each piece of spinach so it had some life to it. In fact both ladies kept using the term “signs of life”. Shots of you pouring dressings and sauces, even taking a single bite out of the food to show the inside, as demonstrated in the tart. Signs of life allow the viewer to feel like the food is right in front of them.
When working with props, make the shots look natural and real. It sounds silly, but I always struggle with how to fold the napkin and where to place the utensils so it looks the most natural. Joy showed us to simply pinch the center of your napkin or dish towel and pull it up, then literally toss it down. Then take at least 2 forks, spoons or whatever, and lay them on top of each other so it looks welcoming. It sounds so very basic, but little tips I had never even thought of, which make a big impression.
Joy also talked a lot about creating a “Z” formation when styling your photos so it draws the viewer up and into the photo. As you can see in the tart photo, the tart is in the center, then the coffee is up in the upper left hand corner, and the towel and utensils are in the lower right corner, creating a very loosey goosey Z.
 Shooting: Lastly, when shooting, make sure to capture your food from a few angles. A bird’s eye view which can really detail the food, straight on/overhead, a side view and from a seated position. These different angles will all showcase a different part of the food, creating visual interest and making the viewer want to taste what you’re showing.
As far as equipment goes, Joy shoots with a very basic (and old, yet effective) Canon Rebel, and still gets gorgeous photos. Lindsay shoots with a Nikon. They both love shooting with their 50mm lens to get the romantic feeling that only a 50mm seems to be able to capture. I have a 50mm sitting in my camera bag which I never use. That’s all changing now though.
 The class was needless to say, very helpful. Now I just need to practice, a lot, at home. I rush through things all too often, and I really realized that if I’m going to get good at this, I really need to take my time and focus on my settings and lighting. I’ve started a little journal to record settings and the kind of light I have when I shoot, so if I come across the sweet spot, I can recreate the magic in the future.
I can’t speak for all you out there, but it seems like us bloggers fall into a few categories. Those of us who are naturally good at things, or good at them because we have past professional experience in the field. So great blogs that have amazing graphics, we may come to find out, are written by a graphic designer. Then there is the category of bloggers who seemingly just luck out with their success. Their content is great, but it may have been timing or being at the right place at the right time that launched them to success. Then there’s the blogger who has to really work hard at things to get good at them. They may be an amazing writer but they struggle with photography. Or vice versa. I think all too often we bloggers feel like we are expected to be good at everything, without realizing that to get good at things, we sometimes have to really work at them. The styling and crafting and cooking and photography doesn’t just come to you because you’re a blogger. We still really have to study a new skill before we feel completely competent. That’s exactly how I am when it comes to food photography. For too long I felt like I was good at DIY photography, so shouldn’t I just naturally be good at all photography? I’m realizing that that’s definitely not the case, and if I want to get good at it I have to put in the time, the effort and take a million shots. So that’s what I’m doing! Wish me luck.
Let me know if you have any specific questions, or email the 2 lovely ladies above for real expert advice. Thank you Lindsey and Joy for teaching such a great class – I learned so much!









I love this! Thanks for sharing.
GIRL, USE THAT 50!!!
Also, I keep white poster board on the side of my fridge for food shots. If you’re shooting at a high aperture, it blurs out and you can’t even tell what the background or base is! 🙂
This class sounds amazing!
That’s it, I’m getting myself some white and black foam board. Like, now. The shots you were able to get with it are amazing! I *always* struggle with backgrounds — my wood kitchen table takes on weird shades in different light, and sometimes the contrast is just too much… I also theoretically know that I should get a second piece of white board to help bounce the light around, I just have never gotten around to doing it. Thanks for the inspiration!
These are great tips, thanks for writing them down!
I’m one of those bloggers who’s just had to work my fanny off for years and years and years. 🙂
Thank you for sharing this. I SO wanted to be at Alt Summit! I desperately need to learn how to take better photos and my house has NO light. But these tips made me start thinking creatively — I really appreciate them.
Wow, great recap! Thanks so much! I missed this session and I was so bummed. I feel like I could apply some of these tips to my DIY pictures, yeah? It’s nice to know Joy shoots with the same combo I do … But I really need to step up my game! Let me know if you want to get together and practice our photography sometime.
I love the tips you were taught! Awesome. Thanks for sharing. The images you shared are beautiful.
Thanks for sharing the photography info. I tried to make it to this class at Alt but it was already full, so I can’t tell you how excited I was to have read about the details. So helpful! We didn’t have the chance to meet at Alt but I’m happy to have come across your lovely blog. Hope to stay in touch!
Great tips! Thank you for sharing! I need to go get some black foam core now!
Hello, the whole thing is going nicely here and ofcourse every one is sharing data, that’s in fact good, keep up
writing.