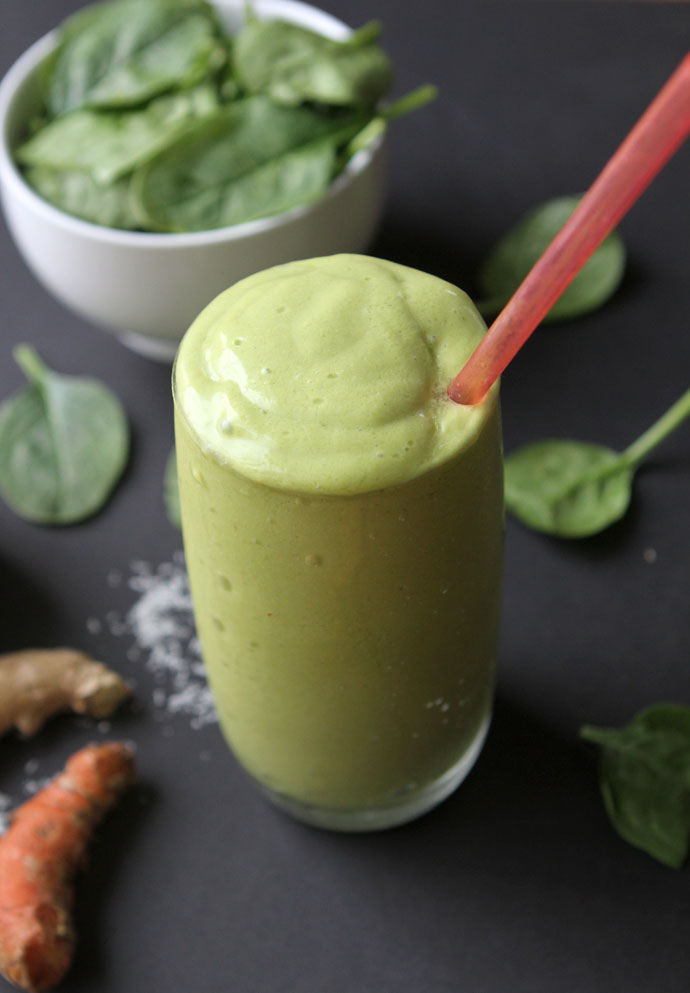
How I Ditched the CoffeeMate, My Keurig and Caffeine

SHARE THIS +

FTLO-26 The question I get asked most often, when readers inquire about the change in my eating habits, is how I was able to get rid of CoffeeMate. From the way folks react with shock horror, when you suggest eliminating the nondairy creamer from their daily routine, you’d think they were more attached to the ritual of using CoffeeMate, than to the actual coffee itself. Many indicate they can’t fathom drinking coffee without the rich creaminess of CoffeeMate, and while I used to relate, as I glugged my cup 1/4 full with the stuff, I now wonder why you’d drink something you’d only find palatable with an add-in.

The road from CoffeeMate addict to straight black coffee drinker took some time, and I did some experimenting along the way. But I did eventually throw our Costco sized jugs of CoffeeMate in the trash, and then eventually switched to drinking decaf on a daily basis. I’m not suggesting or saying you have to go to as an extreme of a measure as I did, by eliminating caffeine all the way, but I hope that I can at least get you thinking about ditching the fake creamer, and maybe trying some better tasting coffee. I’ll start by saying that I was probably a lot like you – addicted to the taste of flavored creamers, and even more addicted to caffeine. I would drink multiple cups a day, at least 2 but some days 3, and would drink iced tea throughout the day, every day. If it was 10 am and I still had not had a cup of coffee, I was not a happy person and felt awful.

Why I ditched CoffeeMate

Why be concerned about ditching the flavored nondairy creamer? Well for starters, it’s made with hydrogenated oils, which is another name for trans fats, and reliable study after study have proven trans fats to be bad stuff. This isn’t conspiracy theory fear mongering stuff, trans fats are agreed to be dangerous to cardiovascular health by pretty respectable doctors and organizations, including the American Heart Association, which recommends cutting the stuff out of your diet as much as humanly possible (some trans fats are naturally occurring in animal products, but the hydrogenated kind found in CoffeeMate, is made cheaply and harshly with a chemical process).

Beyond the hydrogenated oils, it contains corn syrup, artificial flavors and other processed ingredients I can’t even pronounce. But this isn’t supposed to be a guilt trip, just a rundown of why I wanted to get rid of the stuff. Having never met either of my grandfathers because they died of heart attacks, and losing both of my grandmothers due to stroke and heart attack, cardiovascular health ranks pretty high up there for me. Even though I work out consistently and at the time ate pretty well, I really wanted to give it my best efforts to ditch things that weren’t only artificial and highly processed, but also things that I knowingly knew were bad for me. Heart disease clearly runs in my family, so this became a blaring red flag for me.

CoffeeMate alternatives

When I threw out my bottles of the stuff, I became desperate to find something to replace that sweet creamy flavor I had grown accustomed to drinking for years. I tried several brands of almond milk flavored creamer, soy creamer, coconut milk creamer. I tried bulletproof coffee, made with a concoction of  ghee or butter and other stuff, but it was too oily for me.  Eventually it was suggested I try good old full fat half and half, with a dash of real maple syrup, and for months, that was my go-to every morning. Every bit as creamy and tasty as my previous CoffeeMate, I was happy to swill my newly flavored cup of coffee, made with real ingredients. I tell this to anyone trying to make the switch to go this route first. If you don’t love it, give it at least a week and eventually your taste buds will change and will start craving the super sweetness every morning.
FTLO-3

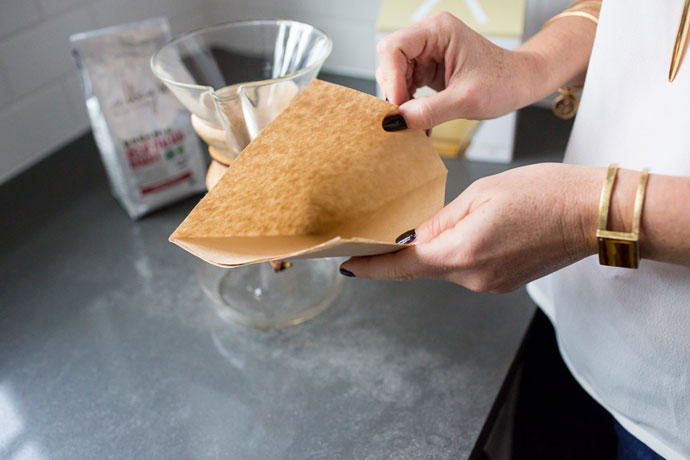
Switching from my Keurig to a Chemex

After switching up my creamer, the next change to come was the process in which I made my coffee. For years we had been brewing out of a Keurig, and while at the time, the recent news coverage of Keurigs’ harboring mold and bacteria proved to be a little over-hyped, I did notice that my coffee just tasted funky most of the time. I was never and still don’t claim to be some sort of coffee snob, but even I was noticing a funky smell coming out of my pods, which transferred to my cup of brewed coffee. A sort of soapy smell, I actually returned several boxes of pods because they just wreaked.  I also was more often getting a lot of heartburn after I drank my morning cup of coffee, something I had experienced before but was growing in frequency, perhaps the older I got.

I happened upon an event hosted by local roasters Heartbreak Coffee, and it was that day I tasted my first true cup of coffee. Flavorful, rich but also subtle in taste, I literally had one of those aha moments and said to my friends, “So this is what coffee is supposed to taste like?!?” It sounds so silly and cliche, but that cup of coffee changed how I viewed coffee, and made me realize just how good coffee was supposed to taste, all on its own. There was no need to mask this flavor with creamers and sweeteners, as to do so would hide the flavor of the beans. And from that moment on I was a changed coffee drinker.

I took home some beans, and the next day I ordered a  Chemex. After doing some research, I found out that the Chemex’s unique filtration system and paper filters, were able to draw out the bitterness of most coffees, and actually made for a smoother cup of coffee. Lower acidity and bitterness also meant my heartburn could maybe find some comfort, because actually giving up coffee sounded like a silly solution to me 😉

While it took some getting used to at first, the Chemex is the only way I brew now. I know some people love French Presses, and I tried one at first, but it was still to strong, bitter and irritating to me. I brew with the Chemex because it not only tastes better to me, but it also is easier on me. I haven’t suffered from any heartburn or acid reflux since switching to a Chemex.

Another added bonus to me ditching the Keurig, was that I was able to help the environment a bit. While we did have a reusable pod, we rarely used it, and were one of the millions of people buying one of the billions of pods produced each year. Keurig pods are non-recyclable, and last year over 9.5 billion cups were produced, enough to circle the earth over 11 times. Even Keurig themselves admit they know this is a huge problem, and have made a company promise to have a recyclable pod available by 2020. That’s still about 50 billion pods away though. *Full disclosure, we still have our machine and keep it in the garage in case we have a big party at some point down the line, but in the last year, have found no need to use it yet. Friends and family would rather patiently wait for a cup from the Chemex.
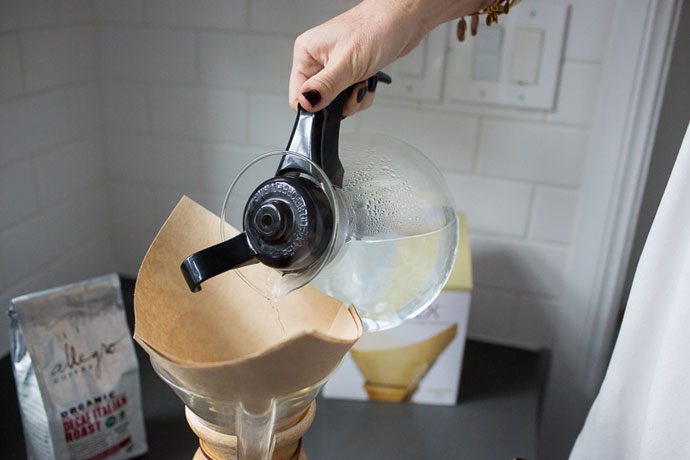
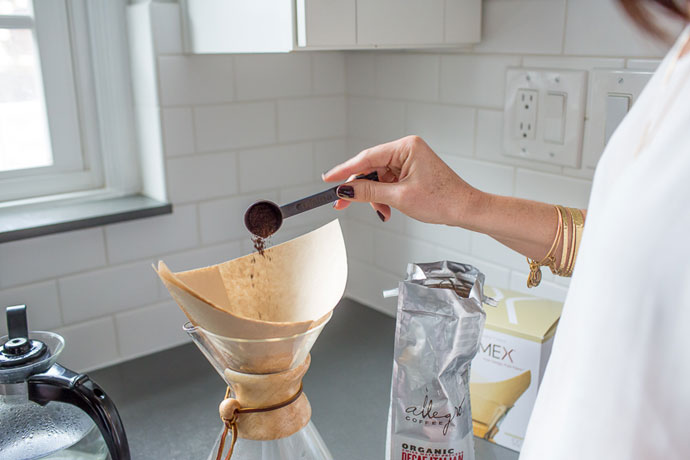
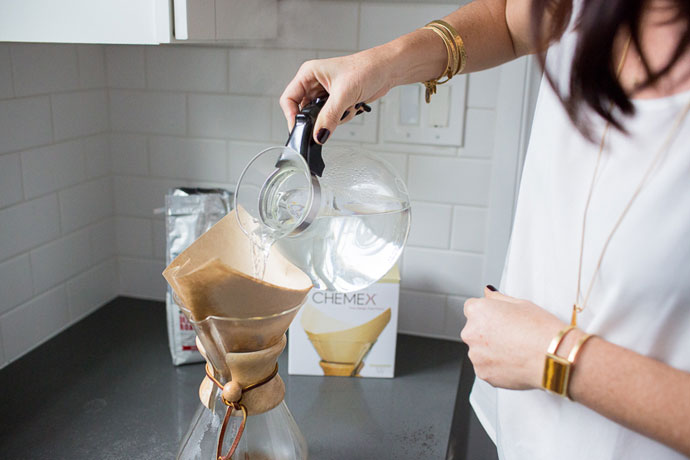
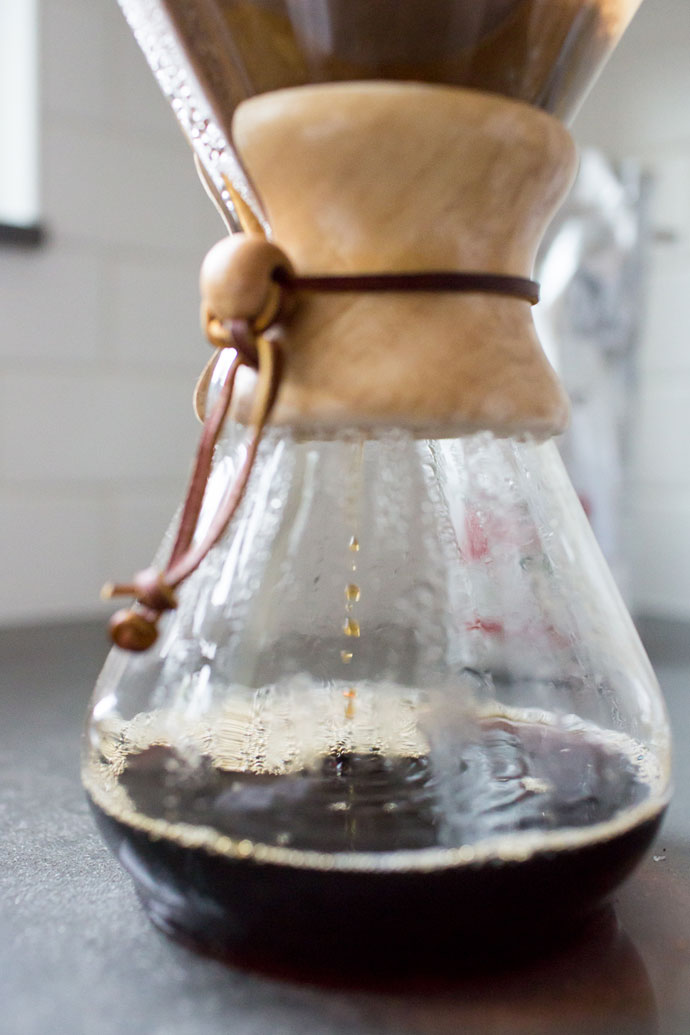
 FTLO-7

The Chemex Process

I also get a lot of questions about the overall process of the Chemex, and most especially about the time factor. So many of us are so busy and impatient for that first cup of coffee that we’ve helped bolster a business making billions of pods a year. Yes, the Chemex process is more time consuming and labor intensive than a Keurig, and even a standard coffee pot, but it’s something I’m now used to, and have fit into my morning routine. I began with a small 3 cup Chemex, but eventually graduated to a 6 cup, which really only makes about 3 American size mugs of coffee.

  • You begin by placing the filter in the vessel, and then moistening it very slightly to preheat the brewer, this step is totally optional though. You then add in your desired amount of grounds.
  • You then add a small amount of preheated water to the grounds, just enough to cover them and allow the coffee to “bloom” and release its flavors.
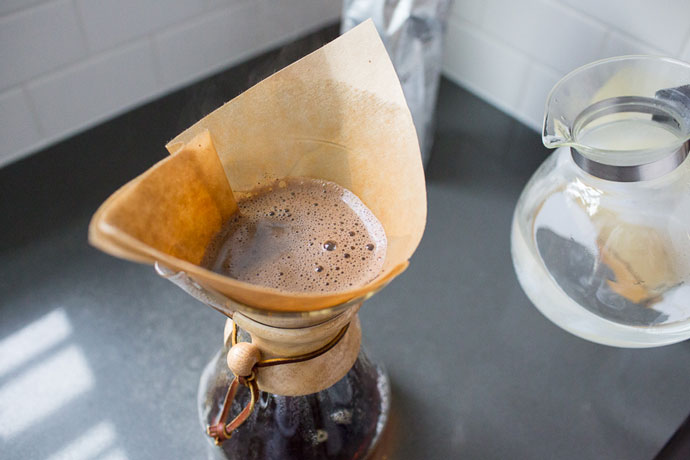
  • Once your grounds have bloomed, you begin adding the rest of your water until the desired amount of coffee is ready. You fill the vessel up to 1/4 inch from the top and let it drip through. The whole process takes anywhere from 5-10 minutes depending on the cup size Chemex you have.

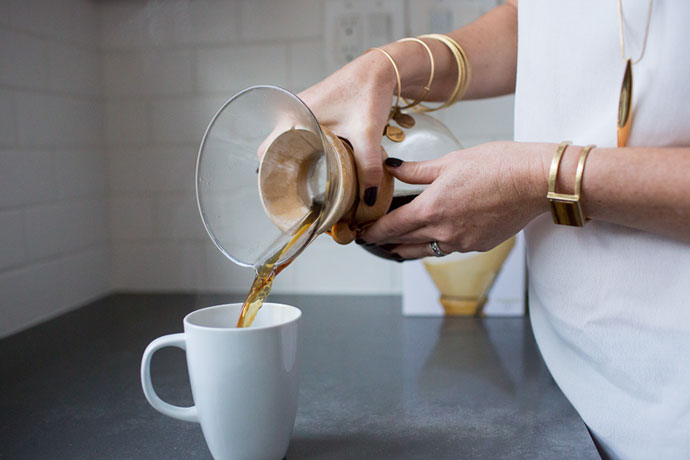
While your coffee is drip brewing, make some bacon, pack the kid’s lunches, wipe down the counters, keep your self busy instead of staring at the dripping process. Once your coffee is ready, simply throw out the filter and rinse out the Chemex. Pour a cup and enjoy.
FTLO-14 FTLO-15 FTLO-17 FTLO-19 FTLO-22 As I said, the process takes upwards of 5 minutes, and yes, there have been mornings where I just didn’t have the time to make myself a cup  of coffee because I overslept or the kid’s schedule was just too busy. I survived and at the time missed the convenience of a regular coffee maker, but overall I’m very pleased about the Chemex. While I think the brewing method can indeed improve the flavor of the coffee, if you begin with crappy coffee, it’s not going to magically make it a good cup of coffee. So I always suggest you focus on investing in some good, quality beans so that you can begin to enjoy the true flavor of a good cup of coffee. FTLO-24 For months I was drinking Chemex brewed coffee with a high quality bean and still adding in my half and half and maple syrup. I eventually knew I needed to cut back some of the costs associated with purchasing more expensive beans, so I started moving over to more affordable, but still decent quality beans, and then eventually eliminated the added cream and sweetener all together. I say this time and time again, but your taste buds really do change over time and get accustomed to different flavors. I eventually grew out of the need for the fake creamer, then I outgrew the need for super expensive beans (although I do enjoy them still!), and then I eventually outgrew the need to have any flavoring at all.

Ditching the Caffeine

Again, I want to reiterate that I’m not suggesting you have to ditch everything from the creamer to the beans to the Keurig to the caffeine, even if you just ditch a portion you’ll be making improvements to your health, the environment and even just your cup of coffee. But going to a caffeine free life is a story worth telling, because months later I still can’t believe I made the switch.

After I did my first round of the 21 day cleanse, I noticed how much more energy I had, and how I rarely got the afternoon slump, something I experienced every single day before. After digging around, it appeared the coffee, and my need to drink it very first thing in the morning when I was still all groggy, was messing with my natural body rhythms and making me even more tired, instead of jolting me awake. So I decided to just stay off the stuff, and only drink it when a good cup of coffee presented itself to me, or when I really needed a good caffeine jolt.

You see, after drinking it for so long, the caffeine had pretty much lost its effectiveness on me, and I became immune to the stuff, yet I was still heavily addicted to it. When I went through those withdrawals, they were brutal, and so since I had gone 3 weeks without the stuff and felt decidedly better, I figured I may as well just stay off the stuff. I still drink truly decaffeinated coffee every morning, using beans that are decaffeinated with the Swiss Water Method, taking out 99.9% of the caffeine from the beans. Regular decaf still has anywhere from 7-20 mg of caffeine in each cup, and I’ll drink the stuff when I go to a coffee shop, but I don’t make it a regular part of my routine so I don’t get addicted to the stuff again.

FTLO-37 
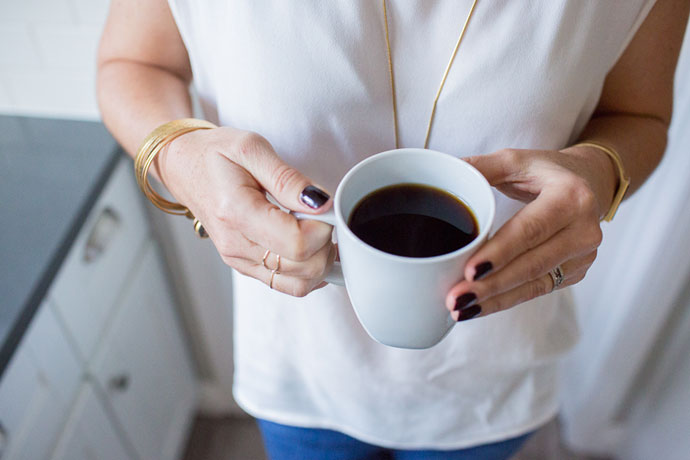
I still love a rich and frothy latte or a creamy cup of coffee as a special treat, but now it’s not something I crave every single day, multiple times a day. I’m embarrassed to admit, but there were plenty of days in my previous life, where I would visit a coffee shop two times a day for a hit, or brew multiple pots of coffee, some at 10 o’clock at night because I was trying to fight sleep. Taking my coffee so simply now has not only reduced my cravings for the rich sweetness of coffee-house beverages, but it’s also saved me a lot of money. I also listen to my body more and actually rest, when it’s trying to tell me to rest. While I rarely get the afternoon slump, I do make myself get more sleep at night because I know I’m gonna be running on my own energy throughout the day.

I’m no saint, and this is just one part of my overall day, in which I have plenty of cravings and make plenty of “bad” decisions, but I’m happy to finally have this whole caffeine and CoffeeMate addiction thing figured out. Let me know if you have any questions.

Are you a CoffeeMate addict, or have you been able to ditch the stuff? How did you go about it?

All photos by the Yung Bean Photography


Daily Style – Windy Season

SHARE THIS +

IMG_9647 Skirt – ASOS last season but so many great midi skirt options at ASOS!, Sweater – Club Monaco, Heels now on sale for $50!- ShoeMint, Reversible Faux Leather Tote – Nordstrom; Necklace – Madewell; Bracelets – Madewell & Alex & Ani  IMG_9634 While the East coast got ready for Juno, otherwise known as Snowmaggedon, us here on the West coast were dealing with the annoying Santa Ana winds. The farmer’s market was half shut down on Saturday, tree branches were ripped off trunks. and hair was flown all about. Other than whipping up some seasonal allergies and dirtying lawns, our seasonal annoyances are pretty minor in comparison to some. Another thing that comes along with the Santa Ana winds, are heat, and so by the afternoon, once we got home from church, I stripped off this outfit and got into some shorts and a t-shirt.  IMG_9652 On another note, I think I need to become one of those woman, now that I’m approaching forty, who changes out her purses with her outfits.  My kids are getting older, ideally I should have a few more minutes of free time in the morning to take care of such a task, right? Because once I get stuck on a purse, I tend to stick with that purse until it falls apart. And at this rate, this thing will be lasting for years to come. So until I become one of those ladies who seems to have it together enough to match her purse with her outfit, you’ll probably be seeing this one over and over and over. Helps that it’s reversible too, although that lately has been seeming like even too big of a chore. I thought things were supposed to get easier as the kids get older? Why don’t I yet have enough time to switch out my handbags, or at least reverse them when need be? Where is my daily schedule going astray? IMG_9639 Of course I hope you know I’m joking.  IMG_9666 IMG_9661 Happy Hump Day all. Hope it’s a good one and you’re staying warm and dry, or wind-free, wherever you are.  IMG_9655


Post 21 Day Cleanse – Now What?!?

SHARE THIS +

21Day-Cleanse_Banner Going through health challenges for an extended period of time, even seemingly minor ones, is one of the most humbling of things we can go through physically. At least it was for me, and because of the roller coaster ride of health I was on last year, it greatly altered the simple notion I had previously held, that “just eating real food” would work equally well for everyone. After my repeated cases of strep throat last year, and before my official autoimmune diagnosis, I knew something within me was just off, and so I ventured on my first cleanse. I swallowed a lot of my words during that period, because after experiencing just how much better I felt off of certain food groups I previously thought I was immune to, I started to learn that the one size fits all approach to eating wasn’t right for everyone.

After my last cleanse, we almost immediately left on vacation, where, if you followed along on Instagram, you’ll know I ate my way through that island. It was glorious and I wouldn’t take it back for anything, but those 8 days of intensive eating with almost daily consumption of alcohol at lunch and dinner, left me back at square one in terms of feeling tired, foggy headed, gassy and bloated. I really missed the spark of energy and fire I had felt during the cleanse, but had no idea what to do to get it back, other than go back on another cleanse. As we entered the holidays, that seemed like a bad idea. Because the purpose of the cleanse is to eliminate common triggers from your diet, so that you can feel great, you’re also ideally supposed to slowly introduce items back in, so you can identify what foods don’t work for you. Kind of like how we introduce solids to a baby for the first time. I went about it the wrong way, and could have saved myself some guess work had I just been a little more patient with jumping head first back into all the non-cleanse foods. IMG_0316

So if you felt remarkably better during the cleanse, chances are, some sort of food that you eliminated from your diet is causing you to feel less than stellar. To figure out what that is, we need to go through what they call a reintroduction phase. I’ll explain more below, but basically, don’t get ready to celebrate tomorrow by guzzling down every food you stayed away from for the last 21 days. We’re going to want to take this slow.

Jumping Back Into Life

If you’re not keen to go through the re-introductory phase, and just want to get back into living, that’s fine, I understand. But if you did like how you felt during the cleanse; less bloated, more energy, increased alertness, better digestion, chances are you will want to hold onto those feelings for as often as you can. You’re probably not into the idea of cooking every single meal from scratch for the rest of your life, but would like to strive for some long term change in overall eating habits. From my own experience, I have a few tips to offer you.

  • Limit how much and how often you eat the most common triggers – dairy, gluten, refined sugar, alcohol & caffeine. Just by being mindful of reduction of these top food sensitivities, you will likely feel loads better.
  • Try to stay off caffeine, so when you really need it, it will do its job. Switch to a true caffeine free brand, one which uses the Swiss Water Method process and guarantees your beans to be 99.9% caffeine free, or try a coffee alternative like Crio-Bru. When at your favorite coffee shop, order a decaf or even half caf, this way, when there comes a day when you really need a jump start, the caffeine will affect you differently and actually do what its intended to do. Going back to your old caffeine ways are likely to cause your coffee to lose its effectiveness over the course of time, and you may start feeling the afternoon slump. If you do go back to caffeine on a daily basis, try not to drink it first thing when you wake up, but let your body wake up on its own, naturally, then drink a cup. Here’s an optimal time schedule for caffeine consumption.
  • Consider switching to raw dairy items, or goat’s milk dairy products as they are less likely to cause an upset stomach. They are more expensive and options are limited, but by saving for special recipes or cravings, you will automatically be buying less often, and eating less, if you only have 1 type of cheese on hand as opposed to 5…yes, we used to be a house that on any given day has 5-7 cheeses on hand.
  • Continue to shy away from sugar, and use natural sugars at home when cooking.
  • Keep your alcohol tolerance low. You’re likely to notice that after being spirits free for 3 weeks, your tolerance is noticeably lower. Try keeping it that way by limiting alcohol consumption, so that 1 -1.5 glasses of wine hits your sweet spot, instead of 2-3.
  • Consider maintaining the morning ritual of a juice or smoothie, at least a few times a week. This is a great and quick way to ensure you get some sort of nutrient rich morning meal quickly, as lets be honest, how many of you skip breakfast because you’re so busy? And it is also easy on the digestive system.
  • Get enough sleep! Simple enough, yes it is. I know we are all busy, and some are busier than others, but no amount of dietary changes and exercises will fix your health, body, mind and spirit, than getting enough sleep. Watch one less show. Shut down the computer, put your iPhone in the kitchen, and read a book instead to relax you. Just sleep more!
  • Continue to be prepared by meal planning and having plenty of healthy options on hand throughout the week. And keep the junk out of the house.

IMG_0314 Reintroduction Phase

Now, if you felt remarkably better on the cleanse, and are committed to figuring out exactly why, then let’s get into the Reintroduction Phase. The Clean Program and Whole 30 both offer similar, but slightly different ways of reintroducing common food triggers, and you can read about them both in this Clean Program document pg. 4-8, and the Reintroduction Plan on Whole 30 site. The biggest difference between the two programs is that the Clean Program focuses on you first testing out dairy and gluten, as those are the most common food triggers, and Whole 30 has you add in legumes and non-gluten grains. Basically, it goes like this.

  • Day 1-3 introduce gluten, while keeping the rest of your diet cleanse friendly. Add in simple forms of gluten, like pasta, a “clean bread” that has gluten but doesn’t have added sugars, dairy, etc. Eat gluten 2-3 times a day so you can see how you feel. You want to focus on only adding in gluten instead of additional non-cleanse items, so you can see if its truly gluten causing you any issues.
  • Day 4-6 take out gluten again, and now introduce a simple form of dairy while keeping the rest of your diet cleanse friendly. Again, focusing on single or minimal ingredient dairy items like a glass of milk, a few pieces of cheese, a plain cup of yogurt, and eat dairy 2-3 times throughout the day. See how you feel.
  • Day 7 reflect on how you feel, any reactions you may have had, and how severe they were. Were the reactions severe, so that you may want to avoid for the long term, or were they mild and not enough to change your lifestyle? Only you can decide this. If you suspect you may have other food sensitivities beyond these two common triggers, continue on with this reintroduction process until you have your triggers figured out.

Eating healthy for the long term is really a journey of self-discovery, and one you have to tailor to your own personal needs and lifestyle. I can continue to babble on about what’s worked for me, and offer suggestions, but I’m human and have had my fair share of missteps, and what has worked for me may not work for you. It’s a process and trial and error, so don’t give up and be patient with yourself and the road you’re traveling.

So with that being said, the only other bit of advice I can offer you, is to take your health seriously and make time for it. Sure, if you feel great most of the time, and you did the cleanse to really just lose some post-holiday bloat, I get it and don’t want to encourage you to fix what ain’t broken. But in talking to thousands of women now for the last year and a half, it seems that many of us are suffering in some way or another, either very mildly or pretty severely. If you participated in the cleanse, and didn’t feel as great as you’d hoped, or even after all these changes still feel like something is amiss with you, than take it further and start figuring out what’s going on. I recommend a simple CBC blood work panel to test for basic thyroid function, possible vitamin and mineral deficiencies like Vit D and magnesium, and anemia. If any levels are out of normal range, push for further testing and answers. Most blood tests are at least partially covered under the most basic of insurance plans. Once you have some answers, consider taking supplements to help make up for deficiencies. So often in the real food world of health and diet, you will hear and read that you don’t need supplements if you’re eating the right foods, and that is simply not true for everyone! So don’t feel like some real food failure, if you decide to take some vitamins and supplements. I take selenium, magnesium, and a probiotic daily. I also just ordered a basic multi-vitamin which I’ll begin taking as soon as it arrives. IMG_0315

What I Personally Learned This Go-Around

I learned a couple of things this time around, than I did the first time. Here’s a few key points and healthy habits I’d like to personally keep on track with for the rest of the year. Let me know what yours were in the comments.

  • Don’t follow up a cleanse with a vacation right away. Last time, we left within days of me finishing the cleanse, and it led right back to lots of unhealthy habits, including almost daily consumption of some sort of sweets and alcohol.
  • I have really fallen in love with smoothie making this time around and want to continue with them because they are such a quick and easy way to get a quick snack or meal in. I also learned to focus on keeping them low in sugar by always focusing on the 3:1 ration of veggies to fruit, and adding in plenty of healthy fats and proteins. Hemp seeds, nuts and seeds, coconut oils and nut milks have been crucial to my smoothie success, and keeping them healthy and yummy tasting.
  • Meal planning is crucial! Having others join me on this program, and rely on me for the meal plans each week was an essential part of the process this time around. I was bored to tears the last time, and also really sick of cooking, so for the entire last week I pretty much subsisted off of salads and ground turkey. It left a bad taste in my mouth, and basically made me go buck wild with take out and all at once diving right back in to all the foods I had just avoided the previous 21 days. Basically, in many ways all that work was in vain. This time though, I feel completely recharged and invigorated about cooking! I say this with the utmost sincerity, it has renewed my love of cooking and trying new recipes. I’m so happy about this. Today, I could pretty much eat whatever I want, and while it’s nice to not feel limited, I also don’t feel like I’m about to be unleashed onto the world like a kid in the candy store.

Didn’t join in, but want to? 

Grab a friend or your partner and follow along whenever you’re ready. Join our private Facebook group and ask questions. Everything you need to know is right here in the cleanse review post, and the subsequent meal plans can be found here in Week 1, Week 2, Week 3. Meal plans, shopping lists, even print outs so you can take them with you and scribble on them, all right within those posts. The Facebook group is a great add-on, as we often shared other recipes and tips, and really just commiserated about the experience. It was an awesome community this time around, and I’m excited to keep it up, as a regular forum for support.

Any general questions you have about this process? Please feel free to ask away, and if you were part of the cleanse, please share your experience with others! Thanks to all who took part in this process, and I truly hope that in some way, it was beneficial to you all.


Caramelized Onion & Chicken Gluten Free Flatbread Pizza

SHARE THIS +

Caramelized-Onion-Chicken-Pizza-7 A couple of months after I completed my first 21 day cleanse, my friend Mary decided to give it a try. She had been suspecting she had some food sensitivities, so she figured it would be a good way to rule anything out. Lucky for us, a couple of weeks in, she got a bit bored with the cleanse food she had been eating, and decided to get creative in the kitchen, hence developing this kick ass gluten free, dairy free and sugar free pizza. This is the perfect indulgence to eat on the home stretch of the cleanse, and remind us that not all hope in humanity is lost. We will make it through these last few final days.   Caramelized-Onion-Chicken-Pizza-1 Of course you don’t have to be taking some vow to eat like a saint to make this little number. This is perfect for anyone who is just interested in cutting down on their dairy intake, or for someone how is truly gluten and/or dairy intolerant, and want to feel like a normal human being again. We all know a significant time without pizza starts to make one feel not only deprived, but down right deranged. Or is that just me? Because I ordered Z Pizza for the kids the other night when Art and I were going out on a date, and it took all my strength to not make out with that pizza. Forget I said that. Start by gathering your ingredients.

A little background; Mary has three sweet boys who, unfortunately, all have some pretty monumental allergies; basically all the common allergens including dairy, wheat, gluten and eggs. I mention this not to divulge Mary’s personal business, but to tell you that she has A LOT of experience with products and cooking this way, therefore, she knows her stuff. When I’m looking for the best gluten free pasta or dairy-free cheese, I go to Mary. She’s an expert because it has quite literally, become her job the last 9+ years.  Let’s begin, shall we?
Caramelized-Onion-Chicken-Pizza-2 Begin by caramelizing your onions. Sort of like spinach, you start out with a massive amount in the pan, but they cook down quite a bit so don’t be alarmed at how many onions you’re cooking up. You also won’t use these all for 1 pizza, but it’s great to have leftovers for making pizzas the next day, or topping on salads, chicken breasts, you name it. Cooking the onions is the longest process of this recipe, so once that’s done, you’re on easy street, especially on round 2.  Caramelized-Onion-Chicken-Pizza-3 Mary’s trick to making the “crust” hearty and stable is to layer two tortillas, with some cheese in between the two, before you begin laying on your toppings.  Caramelized-Onion-Chicken-Pizza-4 Spread out your onions, then your spinach, artichokes and of course your chicken. Then top with the rest of the cheese. A note about the artichoke hearts by the way. Mary suggests you use marinated artichoke hearts because they give the pizza a bit more flavor, but the plain kind that comes in a can also works.

Caramelized-Onion-Chicken-Pizza-5 This is what the dairy-free cheese looks like before you toss it in the oven, and as you can see below, the cooked version doesn’t look all that different. Mary suggests going by time versus the melty factor of the cheese, because if you wait for the cheese to get all gooey and melty, chances are you would have overcooked the rest of your ingredients.  Caramelized-Onion-Chicken-Pizza-6 Feel free to drizzle a little balsamic vinegar on top, but just an option. The pizza on its own is pretty spectacular so don’t feel like you’ve got to load it up with sauces to make it pop. Slice it up and don’t feel guilty if you eat the whole dang thing.  Caramelized-Onion-Chicken-Pizza-8 If you want to make this at home, see below for the printable recipe. And enjoy!

All photography by Mary of Yung Bean Photography 

Caramelized Onion & Chicken Gluten Free Flatbread Pizza
 
Prep time
Cook time
Total time
 
A hearty and filling gluten free and dairy free pizza.
Author:
Recipe type: Main
Cuisine: American
Serves: 2
Ingredients
  • 1 yellow onion, sliced into half rings
  • extra virgin olive oil
  • ¼ tsp salt
  • ¼ tsp black pepper
  • 2 brown rice tortillas
  • 1 cup rice cheese (Daiya brand preferred)
  • 1 cup baby spinach
  • ½ cup artichoke hearts, chopped into 1” chunks
  • 1 cup leftover chicken, chopped into small bite-sized pieces
  • dried basil
  • dried oregano
  • balsamic vinegar (optional)
Instructions
  1. Preheat oven to 400 degrees.
  2. Over medium-high heat, pour enough olive oil to coat the bottom of a heavy bottom pan. Once the pan is hot, add the sliced onions and ¼ teaspoon each salt and pepper. Stir to coat the onions evenly with the oil. Spread the onions out evenly across the pan and let cook for 20-30 minutes, stirring occasionally and scraping the brown bits from the bottom of the pan. If you notice the onions begin to dry out or starting to burn, lower the heat a bit and add a 1-2 tsp of water to the pan. Once the onions turn a rich, brown color, turn off the heat and set aside.
  3. Place one brown rice tortilla on a large piece of parchment paper. Evenly sprinkle half the rice cheese over the tortilla. Top with the second tortilla (the double layer makes the “crust” more sturdy to hold up to the toppings.
  4. Layer the toppings on the tortillas starting with baby spinach, then the chicken and artichoke hearts, followed by the remaining rice cheese on top. Sprinkle on some dried basil and oregano all over.
  5. Place the pizza with the parchment paper directly on to middle rack of the oven and bake for approximately 15 minutes. (Rice cheese does not melt like regular cow cheese so you won’t be able to use the “melt” factor to gauge when the pizza is ready to come out.)
  6. When the edges of the tortilla become browned and crispy, slide the pizza out onto a plate or cutting board. Optional: drizzle with balsamic vinegar. Slice and enjoy!


Daily Style – Jump for Joy

SHARE THIS +

IMG_9577 Jumpsuit – Splendid; Flats – Shoemint, Clutch – St. John, old; Bracelets – Madewell and Alex & Ani

Women typically have a love/hate relationship with jumpsuits, as in we love the concept and how they look on the hanger, but don’t usually love how they look on our bodies. Or how they feel for that matter. They can pull in the wrong places, riding up in areas we’d rather something not ride, and be too short or too long. But if you find a jumpsuit that fits you well, and is cute, you’ve pretty much found the holy grail of outfits, because the inherent beauty of jumpsuits is how easy they make it to get dressed. No mixing and pairing outfits together, just like a dress, a jumpsuit is a one-stop shop in terms of getting dressed in a hurry.
IMG_9584

I was pleased as punch to find this jumpsuit, with it’s smart faux leather details and contrasting colors and fabrics, not only fit me well, but was so dang comfortable to boot. So comfy in fact, I wore this to church, and then proceeded to wear it all day long, even to watch a movie with the kids and head to a friend’s house for a casual dinner. I wore it with flats yesterday because my feet were a bit sore from dancing the night before at my friend’s 40th birthday bash, but I’ve worn this piece with heels and it looks remarkably put together and dressed-up for such a seemingly simple outfit. Back to shiny gold accessories, and I feel ready for just about any occasion.  IMG_9590 So are you on the pro, or anti jumpsuit team? Do you own any jumpsuits, or have you given up on trying to find one that fits well? If you like the idea of a jumpsuit, don’t give up, as if you keep searching for one, you’re likely to find one that fits well and looks great, eventually. It only took me 38 years, but proof is in the pudding. I am obsessed with this thing.


21 Day Cleanse Week 3 Meal Plan & Shopping List

SHARE THIS +

21Day-Cleanse_Banner As we head into the final week of the cleanse, I want to stress how much this week should be about relishing in how far you’ve come, and NOT GIVING UP! For many of us, we may be tired from all the cooking thus far, which is why I really debated making a meal plan for this week. I didn’t want to add unnecessary pressure to create gourmet meals in this final week, but when asked, many seemed to appreciate the guidance of a meal plan, even if every single day of the week wasn’t followed to the letter. If anything, they also appreciated having plenty of menu ideas to fall back on, after the cleanse ended but we still wanted to eat healthily. So my advice to you, take a couple of these ideas and run with them. Make double batches, eat plenty of leftovers, and just make simple meals with menu items like the turkey meatballs and simple sides of veggies and quinoa or rice. I found myself eating a ton of salads during this final week the last time I completed the cleanse, so if salads are your jam, stock up on lettuce and plenty of simple fixings. Make one roast chicken tonight to have shredded chicken for mixing in salads throughout the week, or even buy some canned salmon or chicken. Get creative with basic ingredients, but also keep it simple.

I’ve provided a few juice and smoothie recipes, but have also provided basic ingredient pairings on a couple of days, to sort of help foster smoothie making independence, if that’s a thing 😉 My mom and dad bought a juicer 6 months ago and for goodness sake, they still haven’t used the dang thing because they haven’t decided on a juice recipe book to purchase, with a complete instruction manual on what and how to juice. It’s not that complicated or scary, just have fun with it and know that most smoothies and juices can always be salvaged with a little tweaking in post-production. So have fun and don’t be afraid to try new variations and amounts. I’ve provided a link to a simple diagram of basic smoothie ingredient combos. Feel free to toy around with the quantities of said ingredients until you get the combo right, but keep in mind to always strive for a healthy low glycemic balance of a 3:1 vegetable/fruit ratio. For every serving of fruit you add in, complement it with either 3 servings of vegetables or other type of healthy fat/protein like coconut oil, a nut butter or healthy add-ins like hemp seeds, chia seeds or raw nuts. Also keep in mind, the best way to keep these healthy habits going for the long term, is to get comfortable and confident so that you can make these things without a recipe. So go forth and conquer smoothie and juice making land!

I think I’ve caught all the subs this week, but again, if I’ve missed any, please go ahead and make any necessary subs for dairy, sugars, soy or wheat. There’s a recipe for a pizza on Thursday night with no recipe link, but that will be published here on Wednesday, so stay tuned. Later in the week I’ll be writing a post with tips and advice on easing back into “the real world” and adding in some of the foods we’ve eliminated, to check for intolerance and sensitivities. I also think it will be a good idea to keep the private Facebook group going, as support to those interested in eating well any day of the year, so even if you haven’t participated in the cleanse so far, feel free to join if you want info on great products, recipes and tips for eating healthfully throughout the year.

And if you want to refresh your memory on the last two weeks of meals and grocery lists, you can see the full meal plan from week 1 here, and week 2 here.


Carrot Beet Juice Rice cakes with avocado mash & cucumber slices Garlicky Spaghetti Squash with chicken, mushrooms & kale Repeat am snack Bombay Bowls sub coconut nectar for brown sugar & use white sweet pot
Hands Down the Best Smoothie Handful baked sweet potato fries + cashew cream Warm Pear & Chickpea Salad sub coconut nectar for honey Repeat am snack Turkey Meatballs from It’s All Good, with steamed veggies & brown rice
Cacao + Cherry Smoothie replace bananas with 3-4 dates 1/2 avocado + grain free crackers like Jilz or plantain chips Quinoa + White Chicken Chili Repeat am snack Baked Chicken with Spinach & Artichokes sub ghee for butter
Protein Packed Almond Smoothie Apple slices + 2 tbsp almond butter Leftovers Repeat am snack Carmelized Onion & Chicken Pizzas
Coconut Berry Smoothie 1/2 avocado + brown rice tortilla wrap Mustard Garlic Brussel Sprouts with quinoa or brown rice & leftover meatballs Repeat am snack Zucchini Rolls with simple green salad
Tropical Twist Smoothie Handful of dates + cashews Curried Brussel Sprouts with Chickpeas + Sweet Potatoes Repeat am snack Sesame Citrus Tilapia, sub lemon for orange & coconunt aminos for tamari.
Carrot Beet Juice Raw veggies + hummus Canned Salmon Nicoise Salad over greens, with kalamata olives, capers, celery & cucumber Repeat am snack Leftovers

Download the 21 Day Cleanse Week 3 Meal Plan here
Download the 21 Day Cleanse Week 3 Grocery List here

Previous 21 Day Cleanse Meal Plans:
Week 1
Week 2

Previous 21 Day Cleanse Grocery Lists:
Week 1
Week 2


Pesto & Chicken Zucchini Rolls

SHARE THIS +

Pesto Zucchini Roll-Ups from For The Love Of They say necessity is the mother of invention, and 9 times out of 10, I would say that is definitely how I roll in the kitchen. Mondays are when my parents come over to help out with the kids and spend some time with them, and most of the time, my mom brings over a new dinner recipe to try out. She’s retired and constantly scouring cookbooks, looking for new recipes, and new guinea pigs to try them out on. This week she decided to make a lasagna using some new oven bake noodles she found, and while I of course couldn’t have the gluten-goodness noodles, nor the tomato sauce, I wanted to make myself a dinner that would sorta fit into what the family was eating. I immediately thought of a zucchini lasagna, but then I decided to get all fancy, hence these zucchini rolls were born. IMG_9476 I’ve seen zucchini rolls floating all around Pinterest, so I know the concept is nothing new, but I had a hard time finding a recipe that would work for the cleanse; all either used ground beef, the vast majority used tomato sauce, which is a nightshade and a no-no on the cleanse. I already had the cashew cream made so I knew I could use that as a base to replace the usual ricotta/parmesan mix, but now I just needed something to give the rolls a bite, to replace the tomato sauce. Pesto popped into my head, and a meal was born. IMG_9478 You’re going to want to start by slicing or putting your zucchini through a mandolin. Go for 1/4″ thick slices if you can.  IMG_9481 If using a mandolin like mine pictured here, I found a good trick was to start by passing the zucchini through the mandolin, very carefully guiding it with your hand. Once the zucchini had reached the part of the mandolin where it could sit in it, then add the cutting guard and continue to pass it through. I learned to do this after clumsily trying to pass the extra long zucchinis through with the blade guard on, and quite a few of my slices snapped in half. IMG_9483 Once you have your slices all ready, lay them out on a baking sheet and lightly brush them with a coating of olive oil. This will give them some extra flavor and help them get a bit softer. Bake in a 375 degree oven for about 7-10 minutes, just till they’re pliable enough to work with.  IMG_9485 Now you’re just going to start smearing on your ingredients beginning with your cashew cream, then pesto, and then your pre-cooked ground chicken or turkey.  IMG_9489 If you have trouble finding a pesto sauce that doesn’t have dairy in it, you can seriously whip up your own in minutes. Think outside the conventional pesto box of basil + pine nuts, and go for any other type of soft leafy green and a mild tasting nut. For this batch, I used a salad mix I had on hand which was arugula + baby spinach, and cashews, and it may just be the best pesto I’ve ever made. Your ratios are simple, 2 cups of greens + 1/2 cup olive oil + large handful of nuts, about 1/2 cup + salt to taste. Blend up in a blender or food processor and done! Add in more oil if need be, but these ratios are usually pretty full-proof. IMG_9493 IMG_9495 You don’t want to overstuff these or they will be more difficult to roll up, so be stingy, and just plan to have about 5-6 rolls to satisfy you. IMG_9498 IMG_9502 You can roll them up and then place them in a small baking dish, but I found that just tucking them in together nice and tight, on the baking sheet I was already using, worked just fine and meant one less dish to wash. Once all rolled up, bake in the 375 oven for 10 minutes, then broil for another 1-2 minutes to set them up nice and firm. You’ll find that once they are baked, they stay together fairly well, and aren’t so delicate. I cut mine in two, but my husband popped each one in his mouth whole, like a sushi roll. Pesto Zucchini Roll-Ups from For The Love Of Pesto Zucchini Roll-Ups from For The Love Of Now at this point, I’d like to offer two other suggestions for assembling these. If you want to cut your time in half, then you could simply layer these ingredients flat in a baking pan, like a traditional lasagna. Like I said, that was my original plan, I just decided to do something different since I had my mom there and she was helping manage the kids. But if you’re crunched for time, go for this method.

Another idea I had, which would work great if you don’t have a mandolin, is to slice your zucchini in thin rounds, and layer them flat like a lasagna, or layer them in cupcake baking tins, and have individual little lasagnas. If you have ramekins, you could do the round coins in those as well, then no fussing with trying to pop them out of the baking cup. Just some ideas. These are hard to mess up, so feel free to experiment.  Pesto Zucchini Roll-Ups from For The Love Of You can get the recipe for the cashew cream in this post, but stay tuned, as I’m going to be posting this recipe separately for ease of use, in the next few days. I’ll update the link once I do. The printable recipe for everything else can be found below though. Enjoy, and please let me know if you give these a try. My kids aren’t keen on zucchini, but my husband and I love these, and are worth the effort to make them for a special treat for us. In case you’re wondering, the second night I made these (yes, I ate this 2 nights in a row), I went ahead and served the kids the ground chicken separately, and served broccoli because none of them like zucchini, and rice on the side. So it was a separate meal, but fairly manageable to throw together for them. I don’t do this often, but sometimes there’s no please everyone and I won’t be deterred from trying new things or enjoying the things I love, just to please everyone.  Does that make sense?

Pesto & Chicken Zucchini Roll-Ups
 
Prep time
Cook time
Total time
 
This healthy and tasty dish is great for a special weeknight meal and is gluten, dairy and grain free, making it both Whole 30 and Paleo friendly.
Author:
Recipe type: Dinner
Cuisine: American
Serves: 4
Ingredients
  • 1 pound cooked ground chicken or turkey, reserving leftovers for another meal
  • 1 batch of cashew cream, see recipe link for ingredients & directions
  • 1 container dairy free store bought pesto, or if making your own, note ingredients below
  • 2 cups soft greens including basil, arugula or baby spinach
  • ½ cup olive oil
  • ½ cup mild nuts like cashews or pine nuts
  • 3-4 medium size zucchinis
  • ⅛ cup olive oil for brushing zucchini
Instructions
  1. Preheat the oven to 375 degrees.
  2. Begin by cooking your ground turkey or chicken, by simply sauteing on the stove top, and set aside.
  3. Slice or mandolin your zucchinis, placing them on a baking sheet.
  4. Brush zucchinis with a light coat of olive oil, then place in the oven and bake for 7-10 minutes.
  5. Add your filling ingredients to the zucchini slices, starting with the cashew cream, then the pesto, then sprinkle the chicken or turkey on top. Gently roll up each zucchini and place topping side up, nestling each roll into each other, to help them stay together.
  6. Bake at 375 for 10 minutes, then broil for ½ minutes to help them set.
  7. Serve with a side salad.


Daily Style – Cold Weather Wear

SHARE THIS +

IMG_9397 Coat – Splendid; Python leggings – Splendid now on sale!; Cashmere Sweater – old but similar here; Faux Leather Reversible Bag – Nordstrom; Hunters – estate sale but you can find them at Nordstrom; Bangles – Madewell & Alex & Ani; Hat – Yellow 108 via Prism Boutique

Aside from a rain trench I invested in 2 years ago, it’s been years since I bought myself a coat. Despite the common belief that we don’t have much need for them here in Southern California, it does indeed get cold, with parts of Southern California seeing snow last weekend. And for a native California girl, even temps in the 60’s makes me shiver. So I’ve been saying I needed a coat for a couple of years now, but the trouble is since it’s such a special purchase I won’t need all that often, I can’t seem to commit to a certain style or color. Do I want a shawl collar or double breasted, go with classic camel or back, or make it special with a pattern or bright red? Belted, not belted, short or long. I imagine if I lived somewhere that actually received a true winter, this decision wouldn’t be so hard. You’d have plenty use for a coat everyday for months on end, so you could justify buying multiple coats in different styles and colors. Here in Southern California though, the purchase seems a bit more special, therefore requires more thought. Does this make any sense? Good Lord I can’t believe I’ve diddered on for a whole paragraph about my inability to commit to a coat. IMG_9405 Anyhow, I saw this coat at Splendid back in November and I fell in love. It’s perfect for Southern California because it’s lightweight while being warm enough, and is the perfect silhouette to throw over sweaters, blouses and even dresses, and it works well with almost anything. There’s a part of me that wish it had a belt or a button, but then the relaxed easiness of it would be ruined. So I waited and waited for this beauty to go on sale. But it hasn’t so far, yet as luck would have it, when I happened to stop in the store 2 weeks ago, they were having a special promotion. Donate 5 new or gently used books to the store, and receive 50% off one item. Sold! I went and got some books, brought them back and picked up this “perfect for Southern California” coat.
IMG_9370 IMG_9365 I realize those living in places which actually get really cold are laughing at me and my loose interpretation of the word “coat.” But that’s okay, it’s all the coat I ever need for awhile, or at least until I get the courage to buy a bright red coat.  IMG_9362 IMG_9358 I’m still considering myself one of the luckiest women in the world, after scoring these Hunter wellies at an estate sale 3 years ago, for $25. The estate sale gods were smiling on me that day. And of course I’m still loving and getting daily use out of my reversible tote. I, like most of you, beat my purses up so bad, and so far it’s still looking just as good as the day I got it.
IMG_9423 I’m working on a post about some of my best clothing purchases of 2014, which I’ll have out this week, and I have to say this black cashmere sweater is hands down one of the best things I bought all year. I wear this thing multiple times a week. And these bangles are my newest favorite accessory I sport everyday. I got them on sale at Madewell a few weeks before Christmas and they still have them online. They come in a set of 3, and are large enough to fit over my large hands, and are also lightweight enough so they don’t drive me crazy all day. And they look great with my growing Alex & Ani collection.  IMG_9434 Hoping you all had a great weekend, and have a wonderful week ahead. Happy Monday all XO


21 Day Cleanse Meal Plan & Shopping List Week 2

SHARE THIS +

21Day-Cleanse_Banner We’ve almost made it through week 1 of the cleanse, and while many of us were fighting the Friday night cravings, most of us stayed diligent and powered through. By now most of you should be feeling a lot better, although you may notice some cravings may be kicking in, now that the shock and withdrawal period are over. That’s okay, it’s natural and understandable, and is why I’ve added in a few more good-for-you indulgent snacks in the mix, for week 2.

I also did a few other tweaks to the meal plan, based off of some great feedback from the ladies in the private Facebook group. Many work outside the home, so they were looking for more simple meals they could prep for lunch, and even a few crockpot meals they could leave cooking while away. They also couldn’t do smoothies or juices in the afternoon. So I’ve included more salads and soups that could be made in advance and make for great leftovers. There are also several crockpot meals, and to fix the smoothie problem, I’ve simply duplicated the morning snack, in the afternoon. Remember, the point of the afternoon drink is to help aid with digestion, so if you have the means, you may want to stick with the morning and afternoon smoothie or juice; just repeat one of your favorites. If not though, don’t sweat it.

Don’t sweat it is a phrase I’ve used quite a bit this week. Remember, this is a plan you are striving to meet as much as humanly possible, but we are human after all. While I don’t want to encourage picking and choosing parts of this plan to follow, as you will feel the full benefits when you stick to the plan as closely as possible, I don’t want anyone beating themselves up if things don’t go perfectly. We all have busy and full lives with work and family obligations, so we just want to do the very best we can.

The grocery list is pretty well complete, but compare it to items you may have already purchased last week, or already have in your pantry; there is likely overlap. I’ve notated the addition of extra veggies to eat as side dishes and snacks, so purchase accordingly. And while I tried to scale the recipe back a bit to include less, this is still a lot of cooking for 1 week, so pick and choose the ones that sound best to you, and enjoy leftovers. Lastly, I’ve also done my best to notate any substitutions or eliminations that need to be made, I am human so forgive any oversights. Keep in mind that if the recipe calls for dairy, wine, butter, or a sweetener like honey or sugar, you can make the necessary swaps or eliminate all together.

I think that’s it! I wish you all the best of luck as we enter week 2, and of course make sure to ask me any questions you may have! Enjoy!

Anti-inflammatory Mango Smoothie Pear & Sunflower Butter Roasted Cauliflower & Farro Salad, no feta Repeat am snack Roasted Sweet Potato & Cauli Rice w/ Ground Turkey
Godzilla Juice 1/2 roasted sweet potato wtih cashew cream & nuts Mason Jar, Chickpea & Farro Salad, sub honey & skip feta Repeat am snack Slow Cooker Chicken & Sweet Potato Kale Stew no tom. sauce
Berry Mint Kiss Smoothie Veggie Slices & Hummus or Paleo Almond Spread Carrot & Chickpea Soup Repeat am snack Crockpot Creamy Lemon Chicken & Kale Soup
House Special Veggie Chips & Guacamole Leftover soup Repeat am snack Weeknight Chicken skip pan sauce, with steamed veggies
Hula Hydrator Smoothie Rice Cakes & Almond Butter Pan Steamed Chicken & Broccoli with brown rice Repeat am snack Crockpot Cilantro Chicken with cauli rice or brown rice
Berry Mint Kiss Smoothie Hazelnuts & Golden Raisins Leftovers Repeat am snack Halibut Packets with Squash Date Compote, serve with fave veggie or rice
Godzilla Juice Crunchy Mix of plantains, goji berries, golden raisins & fave nuts Crunchy Root Salad sub coconut nectar for honey Repeat am snack Turkey Stuffed Portobello Mushrooms, serve with fave veggie

Download a printable copy of the 21 Day Cleanse Meal Plan Week 2.

Download a printable copy of the 21 Day Cleanse Shopping List Week 2.


Anti-Inflammatory Power Mango Smoothie

SHARE THIS +

Power-Mango-Smoothie This smoothie came about last week when I realized I hadn’t followed my own grocery list to the “T.” I was going to make the Tropical Turmeric Cleanser, and I had failed to pick up frozen pineapple. I was also in the throes of sugar detox, and it is advised the best thing to help combat that awful feeling of seasickness, is with lots of protein. So I let that smoothie be the template for this one, and made some minor major tweaks to make it suit my own tastes and needs.  Power-Mango-Smoothie-Ingredients I added in hemp seeds, a powerful complete protein that would ensure I got a much needed extra dose of the stuff. Hemp seeds are one of the widely hailed “superfoods” and while I won’t make wild and powerful claims of its healing properties, I do know that in a smoothie, the taste is well-hidden, but topped on salads and oatmeal, it adds a nice and subtle mild crunch. I also subbed spinach for kale because I notice that kale in my smoothies, but not in my juices, has a tendency to give me an upset stomach.

I did make sure to leave in the turmeric, because we could all use more turmeric in our lives. The bright orange root looks very similar to ginger, and can be found in most grocery store produce sections. If you can’t find it though, go ahead and sub in powdered turmeric, but only use about 1/2-1 tsp, as its powerful stuff.  You’ll notice that the inclusion of both the ginger and turmeric in this smoothie gives a subtle dose of spice, and nicely offsets the sweet frozen mango flavor. Turmeric is widely known as being a powerful anti-inflammatory food, and is often prescribed by both holistic and traditional western medicine doctors as a way to help combat a whole host of symptoms. I’m using it almost daily to help with my backaches. By the way, if you are using fresh mango, go ahead and use more ice.

Combine all the ingredients in a powerful blender and blend up. I have this Vitamix Professional Series model and I have not been disappointed with its performance. This makes 2 smaller servings or 1 very large and generous serving. I find it easily feeds myself and my trusty sidekick Hayden, who’s always around and ready to gulp down any smoothie or green juice I make.  Power-Mango-Smoothie-With-Turmeric


Anti-Inflammatory Power Mango Smoothie
 
Prep time
Cook time
Total time
 
This protein packed smoothie is not only delicious, but also anti-inflammatory.
Author:
Recipe type: Breakfast
Cuisine: American
Serves: 2
Ingredients
  • 1 heaping cup frozen mango
  • 1 heaping cup fresh baby spinach
  • 1 cup coconut milk
  • 1 cup coconut water
  • 1 knuckle size knob each of fresh ginger and turmeric, peeled (use 1 tsp powdered turmeric if you can't find fresh)
  • 1 tbsp unsweetened shredded coconut
  • 1 tbsp hemp seeds
  • 1 cup ice (use 2 cups ice if using fresh mango)
Instructions
  1. Combine all ingredients in a powerful blender and blend till smooth