March 17, 2015


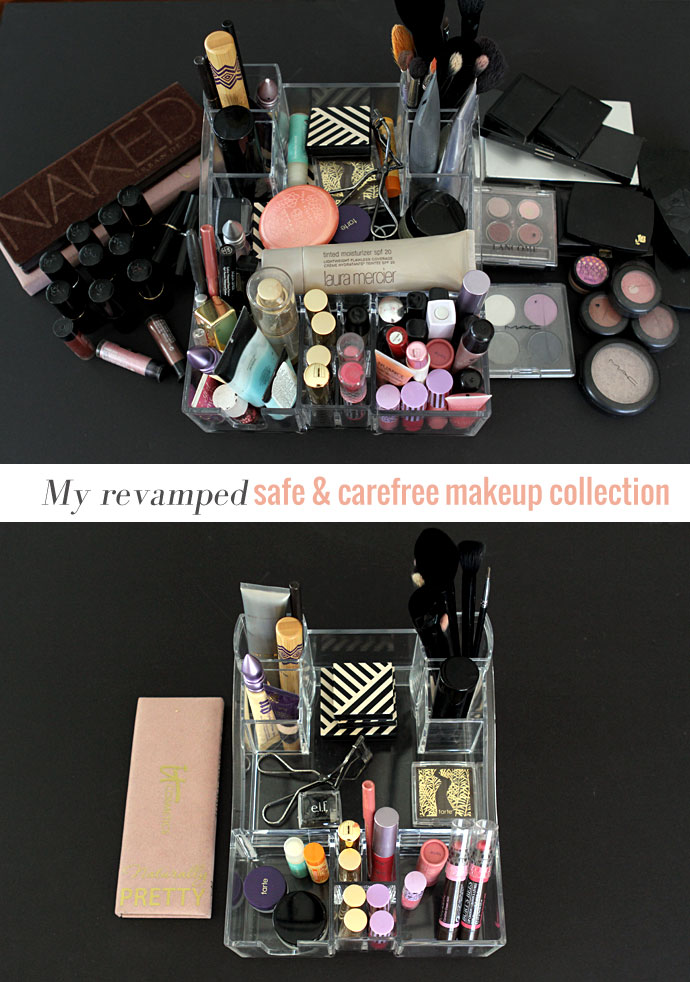 acrylic countertop makeup tray by Caboodle
I’ve been slowly working on revamping my makeup collection for the last year, and after making a few more purchases in the last few weeks, I’ve finally arrived at an assortment I feel good about. To be clear and transparent, this is an assortment of products that I feel good about, and while some may not view them all as safe or clean enough, I am really proud of the progress I’ve made in this department. I am always striving for progress, not perfection, and so in a year this assortment may look a bit or a lot different, but for now this is where I am, and I love each and every one of these products.
After revamping what I put in my body with a food overhaul, an overhaul of what I put on my body was a natural progression. While I at first didn’t give it much thought, when I eventually began looking into the cosmetics industry and the ingredient listing of the many products I was using on a daily basis, I was more than a bit disappointed. Here’s a few key takeaways in case you’re wondering why you may want to revamp some or all of your own routine, to products which contain no harmful ingredients.
- The United States has not passed a federal law to regulate the ingredients in personal care products since 1938.
- The Federal Food, Drug and Cosmetics Act (FFDCA) includes 112 pages of standards for food and drugs, but just a single page for cosmetics.
- Of the 10,000+ ingredients used in personal care products, only about 10% of them have safety data.
- In the absence of government authority, the safety of personal care product ingredients is evaluated through a voluntary industry program known as the Cosmetic Ingredient Review process. Not only is this program run by the very industry it is intended to oversee, but compliance with CIR recommendations is totally voluntary.
- Many ingredients commonly used in personal care products have been found to be carcinogenic, cause reproductive issues, and skin irritations. To see a list of the most commonly used ingredients to avoid, view this list of Chemicals of Concern, or print out Beautycounter’s “The Never List.”
Now enough with the bad news, let’s get into the fun stuff. Note that in determining the safety of each of these products, I referred to both the Environmental Working Group’s site Skin Deep as well as Campaign for Safe Cosmetic’s Think Dirty App. Because I found conflicting ratings for some products, I’m not going to include ratings for each item, but in general my max threshold rating is a 4 for Skin Deep, and a 5 for Think Dirty. All of these products rate somewhere between 1-4 or 5. If the product was not found on either site, I referred to the ingredients and cross referenced to the never list, so none of these contain the big bad ingredients that commonly make headlines; parabens, phthalates, resorcinol, mineral oil, BHA/BHT, etc. Phew, all that to say, I think I’ve done the best I can with my limited knowledge and resources. I will never claim to be an expert “green chemist” so pardon any mistakes, and as always I encourage you to do your own research and proceed in a way you feel most comfortable.
 Face:
Face:
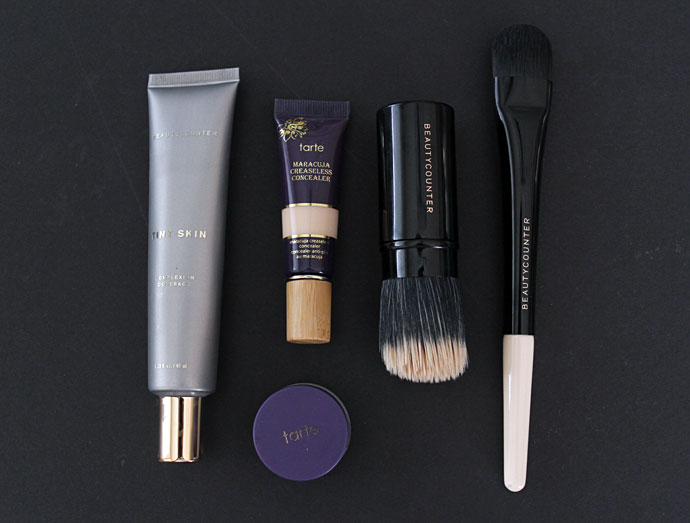
Beautycounter Tint Skin Linen – I replaced my Shiseido BB cream for this product and don’t have a single regret. The best sort of tinted moisturizer I’ve ever used, although they don’t necessarily call it a tinted moisturizer, I love that I can apply a single coat for fresh and light coverage, or can add a second application for coverage you’d expect from a foundation. I know it doesn’t have SPF in it, but since I already use a daily SPF moisturizer, I’m not concerned.
Tarte Maracuja Creaseless Concealer (I also used the Tarte Colored Clay CC Undereye Corrector and liked that as well) – I can’t really say I have a favorite between Tarte’s concealer or corrector, and really just tried out this concealer because they were out of the other product. Great coverage without being drying or cakey.
Tarte Clean Slate Smoothing Primer – full disclosure here, I got this as a gift with purchase and so far I like it a lot, although since I try to keep my routine as simple as possible these days, not sure I’ll continue using it after this full sized sample runs out. Great product however, if you do find the need for an all over primer under your foundation.
Beautycounter Retractable Complexion Coverage Brush & Flat Complexion Brush – I’m going to go ahead and embarrass myself by saying that this little round complexion brush is the bomb! It applies the Tint Skin evenly and quickly since it’s so large, and the flat brush is great for applying a second layer to achieve full foundation coverage. Having used a flat brush for years, I’d say right now I’m preferring the big round brush, but both are fantastic.
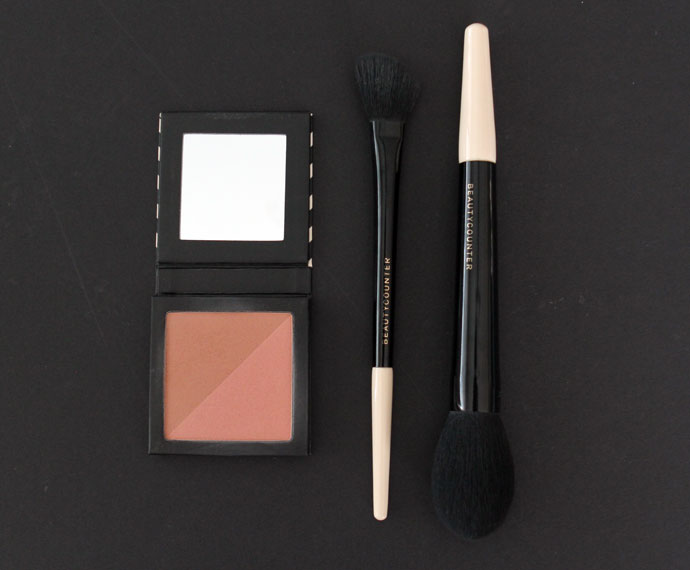 Cheeks:
Beautycounter Color Sweep Blush Duo in Tawny/Whisper – A nice color duo for the coming spring and summer months, I use the darker bronze color to contour my cheeks and jaw line, and apply the lighter rose color on my cheeks. I do love the Bloom/Tulip color duo as well though and think I’ll eventually add that for some variety.
Beautycounter Angled Brush & Powder Brush – I use the angle brush for contouring and the powder brush for all over color. If you’re in need of new brushes, may as well buy the set. You can’t go wrong, these brushes are top notch.
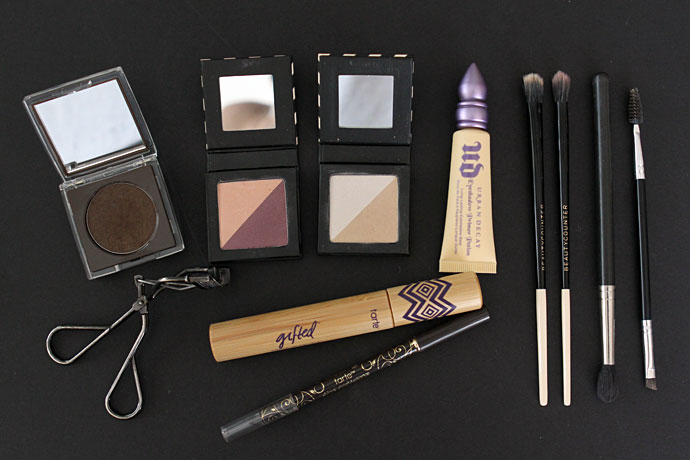
Eyes:
Tarte Volumizing Brow Powder – after years of using eyeshadow to fill in my brows, I finally purchased actual brow powder and not a day goes by that I haven’t used this stuff and loved my brows because of it. Goes on easily, but even better, blends in so it looks completely natural and flawless.
Beautycounter Color Shade Eye Duos in Oyster/Amethyst and Pearl/Champagne – great basic colors, I apply the pearl/champagne all over my lid, and then the amethyst in the crease, and the oyster pink on my inner lid. Love how fresh and natural my eyes look with these colors.
Tarte Gifted Smart Mascara – I’ve been using Tarte’s Lights Camera Lashes for the past 4 months or so, and when I recently ran out I decided to give the Gifted tube a try. I love both equally as much, only discerning factor, if it’s important to you, is Gifted rates a notch better in safety, than Lights Camera Lashes.
Tarte SmolderEYES Waterproof Liner in Moonstone Brown – I have to say I haven’t found a liner I love as much as my old Lancome standby, but this will do alright for now. Goes on really creamy and blends well, only problem is it’s so soft that the sharpener never makes a fine edge, so I never get a thin and defined line. Great for a thicker, and/or smudgier eye though.
Urban Decay Eyeshadow Primer Potion in Eden – just can’t give this stuff up, I tried to switch brands but ended up returning both products and went back to this. Rates a 4 on Skin Deep and Urban Decay is strongly committed to being cruelty free, so why bother switching? Just because a company doesn’t overtly advertise or claim to be “natural” or whatever, doesn’t necessarily mean it’s bad. Something to keep in mind.
Beautycounter All Over Eye Brush & Crease Eye Brush – great brushes for all over and crease application.
MAC contour shadow brush (very old) – I’ve had this brush for about 15 years, I don’t think they even sell it anymore, but it is the best for heavy color application in the crease, and so I will hold onto it forever.
Anastasia Dual Eyebrow Brush – this brush, along with the brow powder, is one hell of a dynamic duo. Apply with the angle side, and blend with the round bristly side, this brush is all sorts of amazing. Love, love, love it!
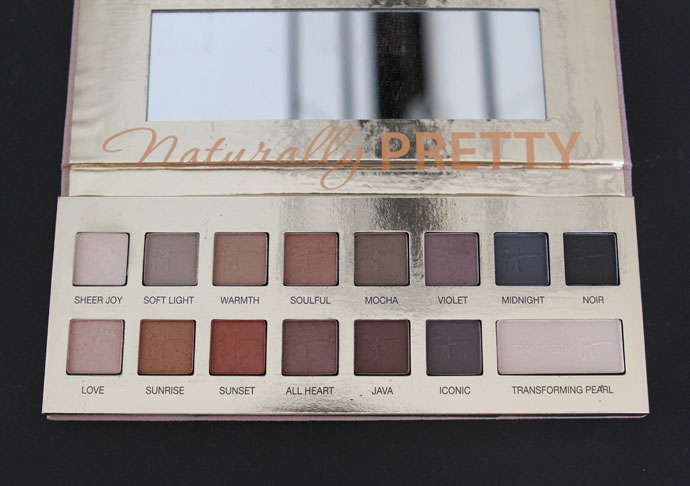 It Cosmetics Naturally Pretty Eye Palette – there is very limited information on It Cosmetics, but they are cruelty free and the ingredient listing read okay, nothing on the never list, so I went with this beautiful assortment of colors and can’t rave about it enough. The pearl color in the lower right corner gives any of the matte colors a pearlescent sheen. By the way, I technically didn’t get rid of my NAKED palette picutred above, as it rates okay on Skin Deep and like I said, Urban Decay is crueltry free. I just needed a break from the shimmery tonal colors, after using that palette for over 2 years straight. It was time to give it a break, and so it sits in my cupboard for the time being.

Lips:
The Honest Company Organic Lip Balm in lavender mint – this lip balm is creamy and totally moisturizing, and tastes good too.
Beautycounter Lip Shine – this is a great lip gloss on its own, or to apply over the lip sheers to enhance and deepen the colors.
Beautycounter Lip Sheers in Plum, Twig & Scarlet – it was hard to choose just a few to start with, but these colors are a great assortment, with Twig being a perfect minimal daytime color, and Plum and Scarlet being a bit more intense and bold.
Beautycounter Lip Conditioner in Peppermint – I love how thinly this goes on, but still provides ample moisture. I put this on my lips under the lip sheers to achieve a more sheer color tone. Also great on its own of course.
Tarte lipcolors from left to right – Plummy Rose, Blushing Bride, Warm Golden Pink, Lively & Fiery – these all have a bit of a different texture, something you may find great or confusing about Tarte’s lip color assortment in general. Plummy Rose goes on super creamy, the gloss is of course a gloss, and the Warm Golden Pink is also very creamy. Lively and Fiery are from their matte collection, therefore go on with a lot of saturation and almost stain the lip, so very long lasting. May at times feel drying though.
Tarte Universal Lip Liner – a great liner for a wide range of colors, the only one it hasn’t worked with so far is my Scarlet lip sheer.
Burt’s Bees Lip Crayons in Hawaiian Smolder & Carolina Coast – most likely because these crayons are still so new, they weren’t found in either of the databases, But since most of their lip colors rate fairly well and safe, I’m taking a leap of faith that these will too when they’re eventually rated.
You probably noticed that the vast majority of the selection is Tarte and Beautycounter. This is sort of on accident, but also on purpose. I didn’t set out to solely use these two brands, it just sort of happened that way after using multiple products. I love that Tarte is so widely available, from Amazon to Sephora to Ulta, which is within walking distance to my house. And after hearing so many good things about Beautycounter over the last year, I decided to finally give them a try. After all I love their advocacy mission and the fact that they’ve taken the legwork out of finding safe products thanks to their strict ingredient safety standards. In the short 4 weeks since I began using their products, I’ve quickly become hooked to many of them (FYI, their shampoo and conditioner are INCREDIBLE!). I’m always open to trying other brands both small and large, so don’t be surprised as my assortment will eventually evolve I’m sure. This is pretty much a minimalist assortment for me after all.
And if you’re concerned about ordering cosmetics sight unseen online from Beautycounter, don’t fret because they have a 30 day no questions asked return policy, so you can try out a product and easily return it if you don’t love it. So far I’ve only had to return the Tint Skin in a wrong color. If you think you may want to try a few of their products, I suggest becoming a member of the Beautycounter Band of Beauty – you pay a $25 annual fee, $10 of which is allocated to one of their nonprofits. In return you receive $25 in reward money for every $300 purchase, free shipping on orders over $100, and special pricing on one of their most popular packages. Or you can join as a consultant, which is what I did. The cost is $85 and you get a discount on all products, and the ability to sell your favorite products to friends and family. I’m not sure if I’ll ever go with the “socials” concept, but I do love the added perks. Let me know if you have questions about either program.
Okay, I think I’ve covered everything! Please let me know if you have any questions at all. I’ll soon be covering my updated skin and beauty routine as well, so stay tuned.


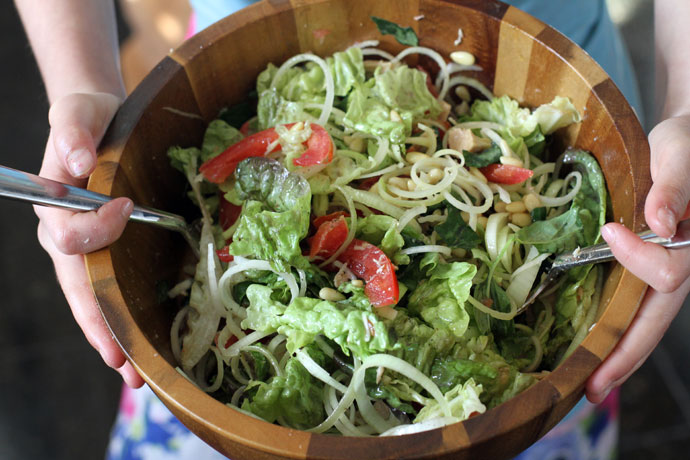
 , and took a keen interest in it. I had purchased it at some point last year, and she barely gave it a glance, even when I offered to help her cook a few things from it. So when the other day, she prepared a whole menu from the book, complete with appetizers and dessert, I eagerly encouraged the experiment.
)


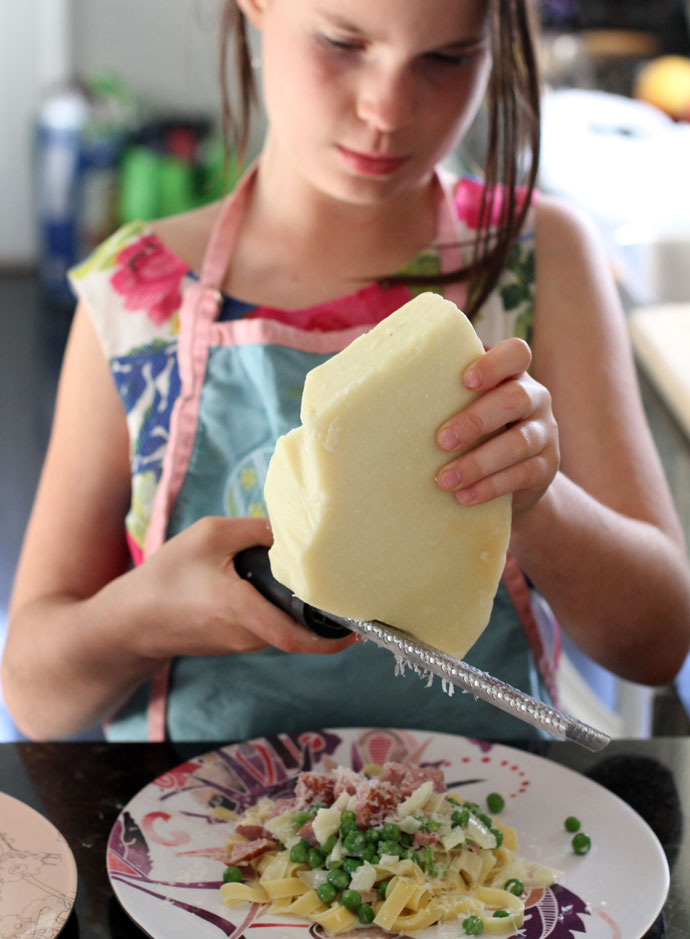

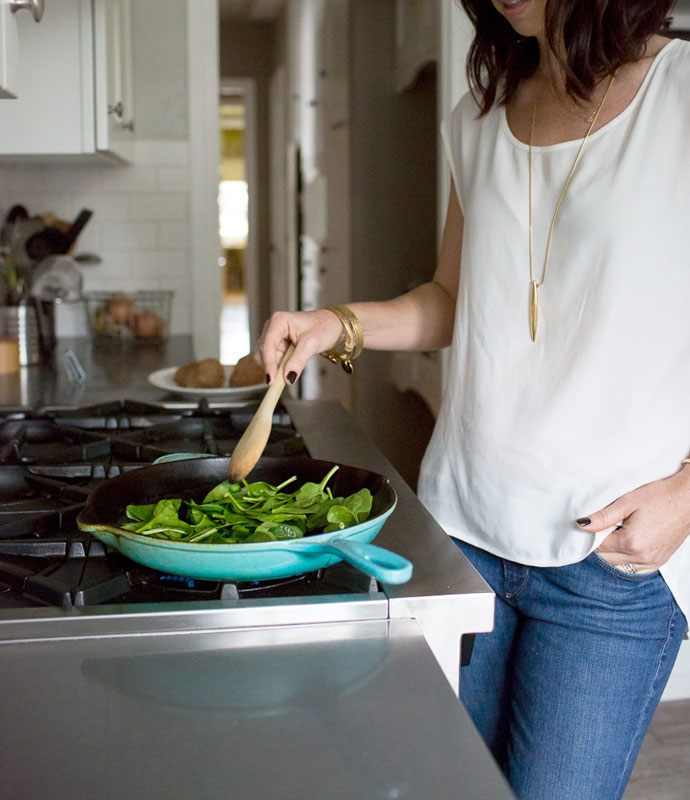
 to chop and dice foods. Just in the last year though have we let Taylor venture into the real knife territory, and believe me it’s scary, but I’ve been impressed at how fast she’s learned and how well she now handles a knife. For the most part though I try to discourage use of my steel Wusthof knives, and instead encourage use of my super lightweight
 )


 books. In all theory, this baby was getting the perfect amount of day sleep, could put himself to sleep, ate like a champ, including solids, so hunger wasn’t an issue, and fell asleep peacefully each night. But he would just not stay asleep. He didn’t sleep through the night until he was almost 1 year old, and even at that, it was a fluke. Somewhat consistent sleep didn’t occur until well into the 18 month mark.
)