Slow Cooker Bolognese

SHARE THIS +

slow cooker tomato sauce with grass fed beef-3 My friend gave me a big sack of garden tomatoes. Now, I know what you’re probably thinking I’m absolutely, 100% crazy for wanting to turn those into a sauce when I should be thickly slicing and devouring them with nothing more than a sprinkle of coarse salt and fresh ground pepper. The problem is when I had a garden of my own, I would plant so many tomato plants I didn’t know what to do with all the gorgeous fruit as they weighed down the branches come late September. I would bottle them. Some would be pureed or diced and frozen to add to be added later to soups and stews. And pounds would be roasted and pureed into the most delicious soup imaginable. But I’d still be left with dozens of tomatoes, so I got into the habit of cutting them up and popping them in the slow cooker to make pasta sauce. The long, slow cooking turns the ripest, juiciest tomatoes into a rich, sweet sauce that rivals any other. slow cooker tomato sauce with grass fed beef-4 slow cooker tomato sauce ingredients

You can certainly make this vegetarian by adding more diced veggies and tomatoes, or substituting finely chopped mushrooms for the beef. For this I’ve used grass fed ground beef. It has big meat flavor and becomes super tender during the several hours of cooking. From there, the world is your oyster, as they say. It’s spectacular spooned between layers of lasagna noodles and cheese, tossed with spaghetti or fettucine, zucchini noodles, or with a piece of thick-cut buttered bread. (My favorite way when I was a kid.) slow cooker tomato sauce with grass fed beef


Slow Cooker Bolognese
 
Prep time
Cook time
Total time
 
Author:
Recipe type: Main
Cuisine: Italian
Serves: 6-8
Ingredients
  • 1 Tablespoon olive oil or butter
  • 1 large onion, diced
  • 1 carrot, peeled and diced
  • 1 celery stalk, diced
  • 3 cloves garlic, minced
  • 1 pound grass fed ground beef
  • Two (6-ounce) cans tomato paste
  • 8-10 cups diced tomatoes, about 12 medium tomatoes
  • Salt and pepper, to taste
  • Hot cooked pasta, for serving
  • Shaved parmesan cheese, for garnish
Instructions
  1. Have a 4-6 quart slow cooker ready to go.
  2. Heat the oil or butter in a large skillet. Add the onion, carrot, and celery. Cook, stirring often, until the vegetables start to soften.
  3. Add the garlic and cook for 30-60 seconds.
  4. Next add the ground beef, using a wooden spoon to break it up as it cooks.
  5. Once it has browned, remove from heat and transfer everything to the slow cooker.
  6. Stir in the tomato paste, diced tomatoes, and ½ teaspoon salt.
  7. Set slow cooker to HIGH for 3-4 hours, or LOW for 8-10 hours.
  8. Before serving, taste and add more salt if needed, and season with black pepper.
  9. Serve over hot, cooked pasta and garnish with cheese.


DIY Honeycomb Spiders

SHARE THIS +

Honeycomb spiders for Halloween!

Halloween is my favorite holiday and I have good reason for it. Besides the facts that it is at the loveliest time of year (weather wise), that it is just two days after my birthday, and that sneaking some candy into your diet is basically required, Halloween also evokes a lot of imagination. I mean, at no other time of year is it considered completely appropriate for a grown man to wear a jumbo diaper and carry a rattle. I can support a holiday that encourages humorous cross-dressing and face painting for all ages. One thing about Halloween I love is that people decorate with things that on any other day of the year would normally terrify them. Bats are creepy…let’s turn them into a garland for the fireplace! Spiders scare the crap out of you? A cute fluffy spider wreath for the front door it is! Three-inch mummies equal cake toppers and zombies are not just shooting target, but also lovely porch decor. It’s madness on Halloween, and I love it. So I get really into the spirit of spooking every year, put aside my arachnophobia, and come up with some creepy crawling crafts. This year I made a honeycomb spider decoration that I can’t wait to stick on the top of the cake for my birthday! You should make one too!

Items you will need:

Honeycomb spiders for Halloween!

– Sticks or twigs. This last year we trimmed up some trees and I saved a bunch of branches for crafts just like this. My husband thinks I’m crazy; I prefer resourceful.

– 5″ black honeycomb balls. I bought mine from this website. You can choose to make spiders any size you want…just order the right honeycomb ball size. I think some giant honeycomb spiders might be my next craft!

– Black paint and a paintbrush.

– A hot glue gun and glue sticks.

– Pliers to cut twigs from the branches.

Honeycomb spiders for Halloween!

Step 1: To begin this craft you are going to need to use your imagination a bit. What I mean is you are going to have to trim “spider legs” off of your branches. For my spider legs I tried to trim the creepiest of twigs that looked like they could just crawl away. Once all your legs are cut, paint them in a thick coat of black craft paint and allow the paint 15 minutes to dry.

Honeycomb spiders for Halloween!

Step 2: While those creepy crawling legs are drying I assembled my honeycomb balls. Each honeycomb comes in the shape of a half circle and folds open into a little 3D honeycomb ball–the perfect little spider body.

Honeycomb spiders for Halloween!

Step 3: For the final step it’s time to add the legs. Begin by applying a generous amount of hot glue to the end of a spider leg twig. Then stick the leg into an opening in the honeycomb ball. I held each leg in place while the glue dried, that way none of the legs fell out or shifted positions. After gluing all 8 legs in, the little honeycomb spider should stand up on its own.

And that’s it! A perfect little spider for Halloween decor or a spooky cake topper!

Honeycomb spiders for Halloween!

Honeycomb spiders for Halloween!

Honeycomb spiders for Halloween!


Easiest Vegan Coconut Red Curry

SHARE THIS +

Vegan Red Curry If I had a nickel for every time someone asked me what the heck I was eating on my detox, I’d have at least $1. I did get asked a lot, because when you roll out the list of things you *can’t* eat, it seems like the list of what you *can* eat would be teeny tiny. But in reality, if you’re cooking at home, your possibilities are abundant. Eating out is another story, as I’ve already told you all about. But at home, for the most part I felt free to cook, or modify, foods I was craving. Vegan Red Curry Curry is one of those things I go in and out of craving. I won’t think about it for months, and then I get a craving and I have to have curry right this very second! The other day, my friend Candace sparked my craving when I ran into her at Sprouts and she told me what she was making for dinner. From then on out, it was curry for lunch and dinner, for about 4 days straight.  IMG_7698 Of course my family doesn’t love curry as much as I do, or really not at all, so this was the perfect dish for me to make myself during the detox, since it would ensure I had lunch and dinner covered on the nights I made something that wasn’t detox-friendly. This recipe lasted myself for 4-5 meals, and would easily serve a family for one night or a couple of 2 days, especially serving it on top of rice or noodles.  IMG_7703 The types of vegetables you use are all up to you, but standard curry usually involves carrots, a squash of some sort, potatoes and a green. Potatoes, since they are a nightshade, were off limits for me during the cleanse, but normally I would’ve added those in a heart beat. The mixture of baby zucchini, baby bok choy, carrots and onions was wonderful though, so adjust as you wish and include or leave out according to your tastes and preferences.  Vegan Red Curry Ingredients If you want to make your curry vegan, use these 2 simple ingredients which are widely available just about anywhere. Full fat coconut milk will give the best richness and flavor, and the Thai Kitchen red curry paste is as clean as they come, and sure is convenient. I read reviews that the paste didn’t have a strong enough curry flavor for some, so if you like strong flavor, consider adding in some curry powder as well, but this was plenty tasty for me. Vegan Red Curry Ingredients To take the flavor up a notch though, if you’re not concerned about this dish being vegan, adding in a good tablespoon full of Red Boat Fish Sauce , which is outstanding and adds a nice flavor you wouldn’t get otherwise. Never in a million years would I think I’d own and use fish sauce as much as I do now. Beware though, it has a strong odor when you first pour it, but it burns off after cooking. IMG_7707 , which is outstanding and adds a nice flavor you wouldn’t get otherwise. Never in a million years would I think I’d own and use fish sauce as much as I do now. Beware though, it has a strong odor when you first pour it, but it burns off after cooking.  You want to saute your carrots and onions first, before adding your more delicate veggies like squash and bok choy. If you’re using potatoes, add these in here as well.  Vegan Red Curry Once you’ve cooked the heartier veggies, add in your softer veggies and let cook for about 10 minutes, perhaps even covering the pan to trap in some heat and steam. Vegan Red Curry While you’re cooking your veggies, you are warming your coconut milk and curry paste in a small saucepan over medium-low heat. You can skip this step and just add in your coconut milk straight to the pan of veggies, then stir in your curry paste, but your coconut milk may look a little curdled. Still tastes as good, just doesn’t look as pretty. If you’re going for speed and less dishes, just do it this way, but if you want it to be purty, definitely heat separately.  Vegan Red Curry Let the curry mixture and veggies simmer together for a few minutes, just to mainly let the flavors coat and meld into the veggies, and then you’re ready to serve. I really love this over brown rice, or the Tinkyada Brown Rice Spirals.

Vegan Coconut Red Curry
 
Prep time
Cook time
Total time
 
An easy and satisfying weeknight meal.
Author:
Recipe type: Main Dish
Cuisine: Asian
Serves: 4
Ingredients
  • 2-3 heads of small baby bok choy, cut in half or quarters
  • 3 carrots chopped in 1 inch slices
  • 1 whole onion thinly sliced
  • 2 small zucchinis or 4-5 baby zucchinis chopped in 1 inch slices
  • Optional add other vegetables like potatoes or cauliflower
  • 1 can full fat coconut milk
  • 3 tbsp Thai Kitchen red curry paste or other similar curry paste
  • 2-3 tbsp coconut oil
  • optional 1 tbsp fish sauce
Instructions
  1. Heat coconut oil in a large and deep skillet on medium heat. Add onions and any hearty vegetables like carrots and potatoes and cook for 7-10 minutes, until slightly soft.
  2. Add in zucchini and any other more delicate vegetables, and cook for another 5 minutes.
  3. Add in the bok choy or other greens like spinach, at the end, cover and cook for 10 minutes, or until wilted.
  4. Meanwhile, warm coconut milk and curry paste in a small saucepan on medium heat, allowing for a gentle simmer and stirring occasionally.
  5. Pour curry sauce over vegetables, and add in the fish sauce if using. Stir to coat and heat through.
  6. Serve over brown rice or brown rice pasta.

Whatever you top this on though, I promise you this is one of the easiest, yummy dishes you will make yourself this week! Recipe below.


DIY Wire Star Wall Art

SHARE THIS +

Wire art DIY

A few months ago I passed a beautiful art wall that had some really interesting wire art. The wire was shaped into a city landscape and had this unique sketched look about it. I loved the wire art’s simplicity and that I had never seen anything like it before. So I set out to create some wire art for my own home. I stared by creating wire stars, but now that I have one project under my belt I think it’s time to start experimenting with other shapes and silhouettes. The best part about these wire stars is that they make a huge statement without overtaking a space.

Wire art DIY

– Bailing wire…I bought my wire at my local hardware store and it is the perfect wire for wall decorations because it is easy to shape and thick enough to make a statement. Plus it costs $2.50. Can’t beat that price.

– Needle-nose pliers.

Wire art DIY

Step 1: Begin by unwinding a few feet of the bailing wire and stretching it out straight. It is easier to start forming the wire art when the wire is straight to begin with. Then, using the needle-nose pliers, form the shape or silhouette you want for your wall art. The best way to manipulate the wire is to bend the wire with the pliers, but to smooth out bumps using your fingers. I think the wire looks more unique with several overlapping wires that follow the same shape so once you finish the first wire form, repeat that shape several times.

Wire art DIY

Step 2: Then, to make sure all those wire stars stay together, cut a 3″ piece of wire and twist it around the star forms. This secures them together and makes it easier to hang up.

Finished! If it seems like this DIY project is super easy, that is because it is! I hung my starts next to my bed and they offer the perfect touch of DIY to our room without it being cheesy or expensive.

Wire art DIY

Wire art DIY

Wire art DIY


Thriving On A 21 Day Cleanse

SHARE THIS +

thriving-on-a-detox-2 Last week my editor checked in and offered a post suggestion; “5 Funny Things You Think About When On a Detox.” I at first agreed to write the suggested post, thinking I could weave a funny little tale about life on a detox, and be done with it. But the more I sat on it, I wrote her back and told her no. Because I wasn’t going insane on this detox, wasn’t starving, wasn’t craving everything in sight, wasn’t a raving lunatic bitch. I actually felt pretty dang good in fact. So instead of that funny post about surviving a detox without killing someone, I wrote about detox myths and today, I’d like to share a little a bit about how I not only survived the cleanse, but thrived.

If you need a rundown on the details of the cleanse, go ahead and visit the 21 day cleanse recap post I did when I first started. As I’m writing this, I am cruising through day 21, with just dinner left to go. To tell you the truth, when tomorrow comes, I don’t plan on going bonkers on everything in site, nor do I plan to tiptoe around adding foods back in. I have an appointment with an Endocrinologist and Hematologist over the next 2 weeks, where more blood work will be completed, so until I have answers as to what may be wrong, if anything, I’ll go back to life, sort of as normal. But I do plan to try and walk along a very similar path as I have these past 21 days. More on that later.

First, what did I eat during the cleanse? 

I’m working on a comprehensive 21 day printable meal plan that I can share with you, so you can see exactly what I ate, drank and snacked on for the last 21 days. I hope to have that up and ready in 2 weeks. Wish it could be sooner, but we leave on vacation Sunday and I just don’t think I can get it done before then. In general though, I ate the vast majority of meals at home, as eating out, for the most part, was a complete pain in the ass. I ate lunch at Wahoo’s twice, and ordered their grilled fish bowl with brown rice and black beans, and topped with their tangy cabbage slaw, which has no added sugar – I checked. Eating at CPK or Corner Bakery, when I tried, was a joke. Every single food item had one of the top ten allergens, which is what I was avoiding, or at the very least, sugar, added to every single menu item. If eating out while on the cleanse, either call ahead if it’s a small restaurant, and to make it easier on yourself, just tell the manager you have dietary restrictions, and ask if they have dishes without the top allergens. If eating at a chain restaurant, they should all have a list of ingredients and allergens behind the counter. Ask for it and review it. You’ll probably be disappointed and will understand how people with severe allergies feel. Then you’ll sulk and go back home and cook some more.

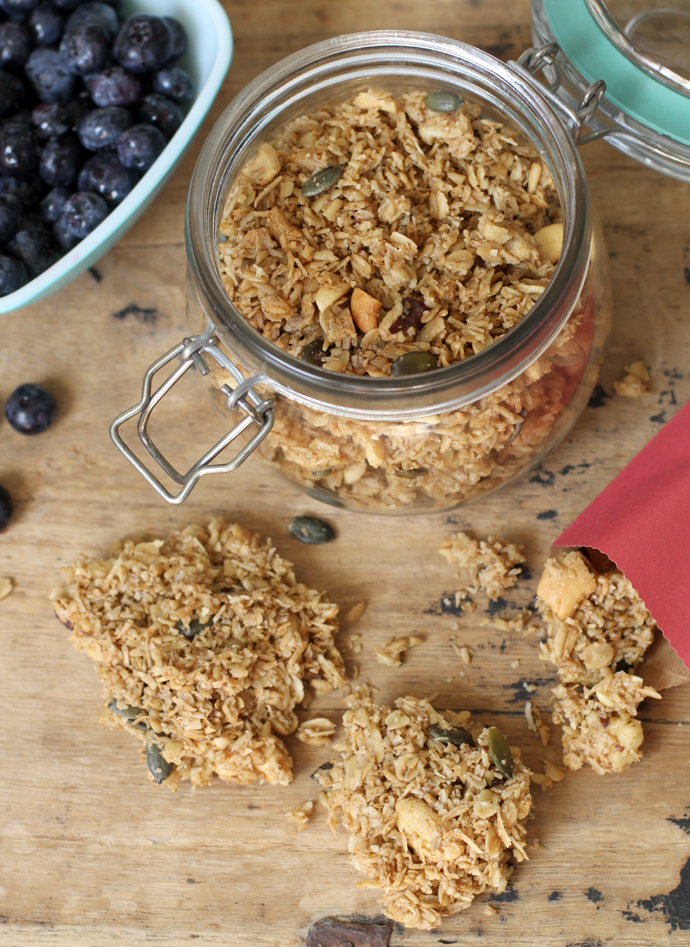
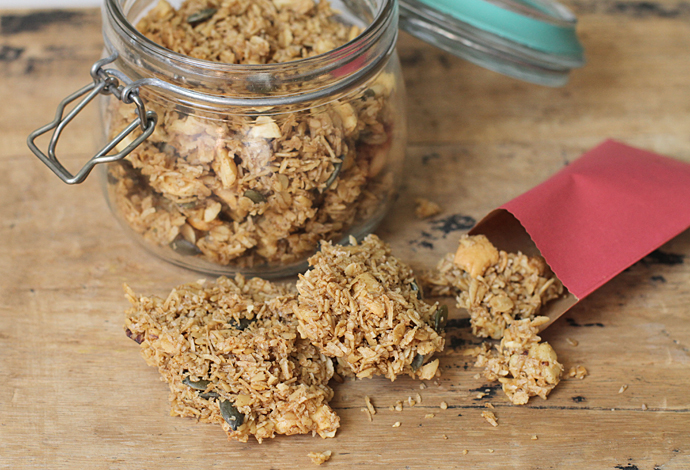
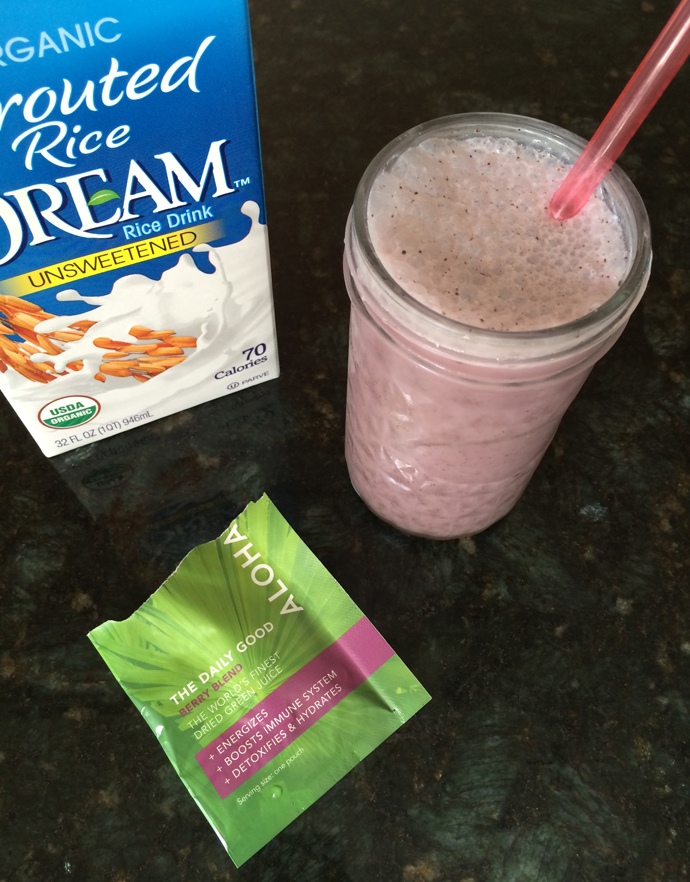
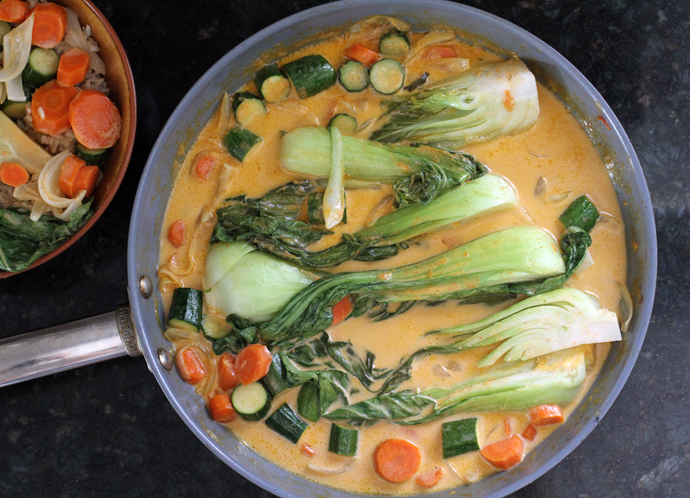
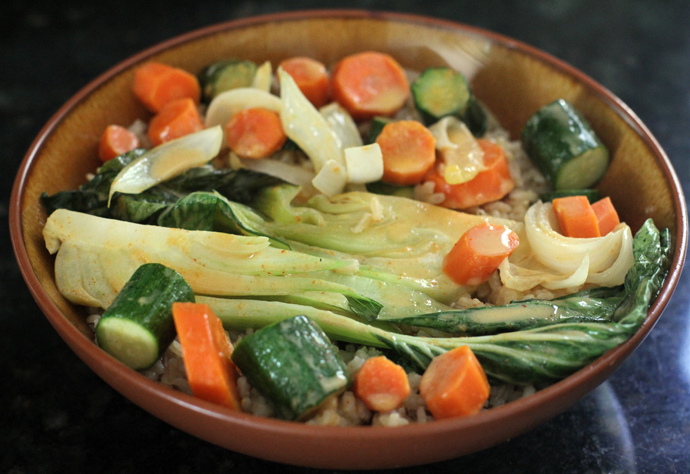
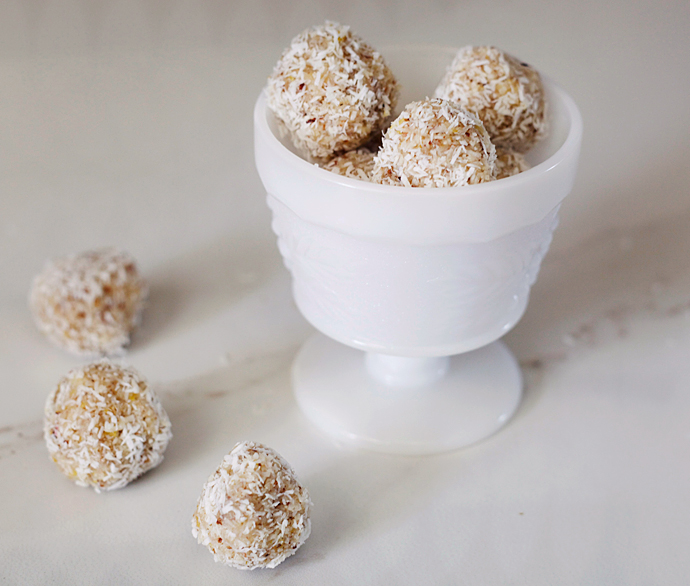
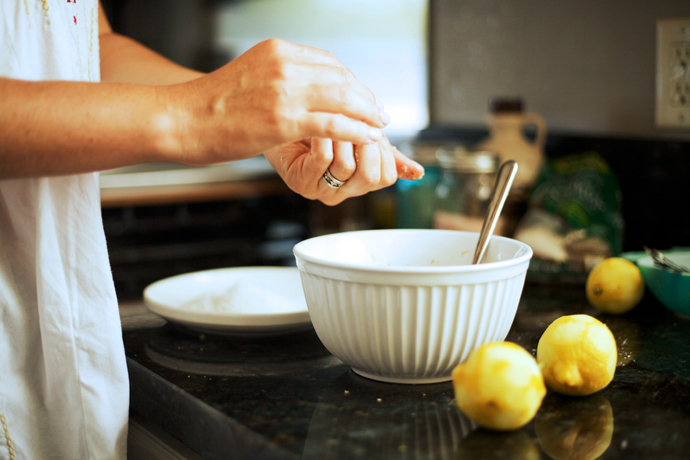
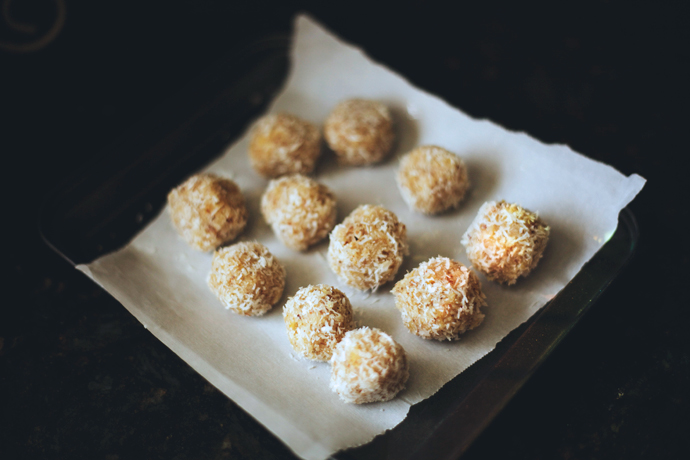
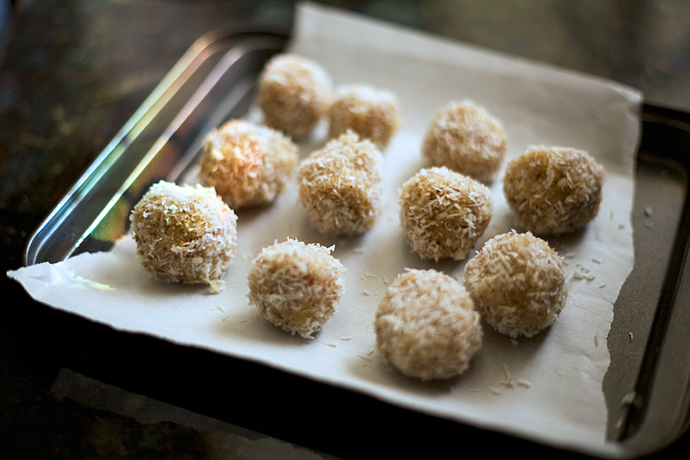
Back to what I ate, sorry about getting off track! Since breakfast is a juice, for morning snacks I mainly ate apple slices and almond milk, carrot cake energy bites, if I was really hungry after a hard workout, I’d have a rice tortilla with avocado spread on it, or on days when I wasn’t really hungry at all, I’d eat some cashews or a “nice” pear. Lunch was usually a salad because it’s the easiest thing to whip up during the day, my afternoon drink was often a smoothie or water with Aloha pack in it, because I couldn’t bear the thought of cleaning my juicer again. And dinner was a whole myriad of things, which I shared over on Instagram almost daily.  detox-3

Was I Starving?

I can say this with utmost sincerity, I was not! Of course I got hungry, as we all do before meal time, but I was able to function very well all day and not be consumed with hunger. I was not limiting calories here, and really the only main difference was that I wasn’t eating breakfast, rather drinking it with a green juice, which I do some days anyhow.  This does not mean you won’t be hungry, I don’t know what your daily meals look like, but with my existing eating habits, I felt satisfied. To avoid after dinner munchies and cravings though, I did often get into bed by 9pm  and read or watch TV so I wasn’t tempted to sneak into the pantry for my chocolate covered almonds. And late night munchies are usually about cravings rather than hunger anyhow.

Keep in mind that when your body gets on this pattern of eating and drinking around the same time everyday, and when you’re feeding it nourishing foods like you *must* do on the cleanse, you will naturally end up feeling full and satisfied because you’re giving your body what it needs to function, not supplementing with empty calories. Also, several studies show sugar consumption can make you actually feel hungrier.

What About Cravings?

I’m not going to lie and say I never had a craving, because of course I did! But not giving into my cravings was both a testament to some mental fortitude, but also science. Sugar and salt when consumed, serves to fuel more cravings for sugar and salt because it’s pretty addictive stuff. When you eat less of it, your taste for it changes and you crave it less. I found myself not even being fazed by sweets by the end of this, but savory, salty foods is another story. I ordered pizza for the kids on Friday night, 18 days into the cleanse, and I almost bit my arm off it looked and smelled so good to me!

But I didn’t give in, because I was feeling so good I didn’t want to rock the boat. See, I wasn’t doing this cleanse because I wanted to lose a few pounds (although I did do that), I was doing it because I wanted to feel better, and after I got past the caffeine withdrawals of the first 3 days, I felt 10 times better than I had felt in the past 6-9 months.

How Did I Feel?

While on the cleanse, I continued to work out 4-5 times a week, and felt great doing so. I got a ton of projects done around the house that I had been putting off, and I continue to avoid the afternoon slump. All in all, I feel annoyingly great! 😉

Going Forward?

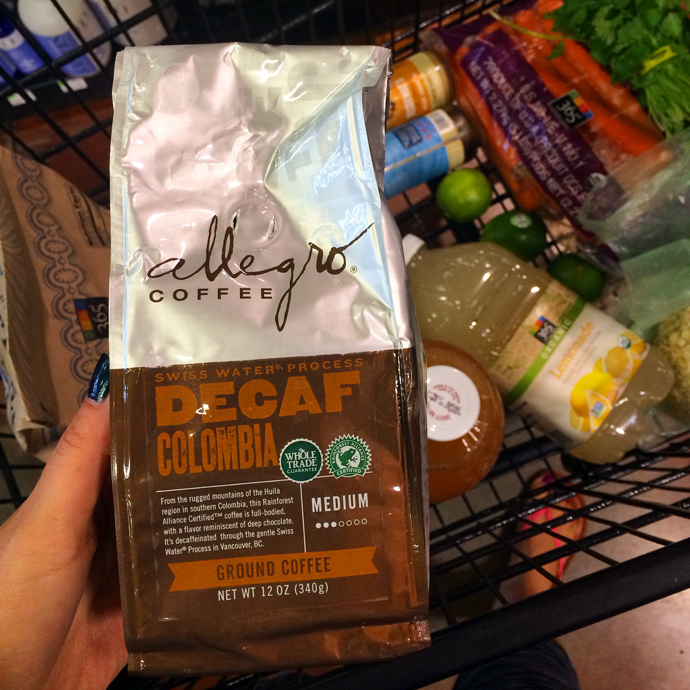
Tomorrow I plan to wake up and try out a cup of the Allegro decaf, which is guaranteed to be 99.9% caffeine free, through the Swiss Water Method. I don’t plan to back to caffeine, if I can help it. I also plan to be very mindful of my sugar intake, as I think that was another big reason why I felt so full of energy. Plus, sugar helps to feed infections, giving me even more reason to try and limit it as much as possible. As far as the other foods I avoided, I don’t think I’ll worry about them too much unless I get results back which indicate I have an autoimmune issue, which then I would consider following this sort of diet indefinitely.  thriving-on-a-detox

Any Tips?

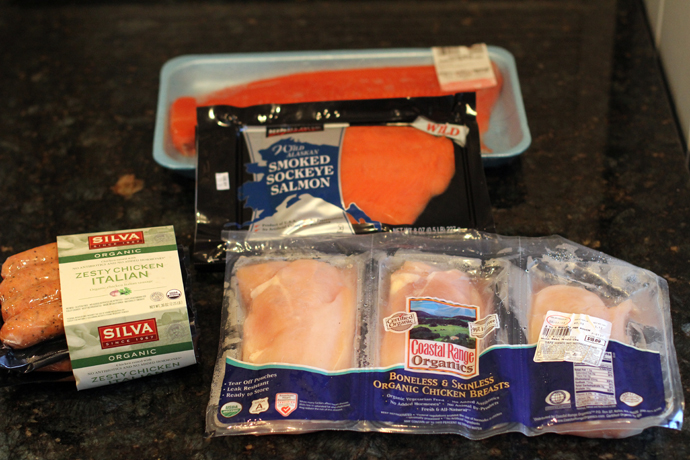
Read your labels, you’ll be surprised how often sugar in some form is in packaged foods, from almond milk to roasted chicken you get at the supermarket, sugar is added to so, so many foods!

Cook in batches and reserve leftovers just for you. This was crucial! Each week I cooked one separate dish just for myself, to eat for lunch and dinner for a couple of days.

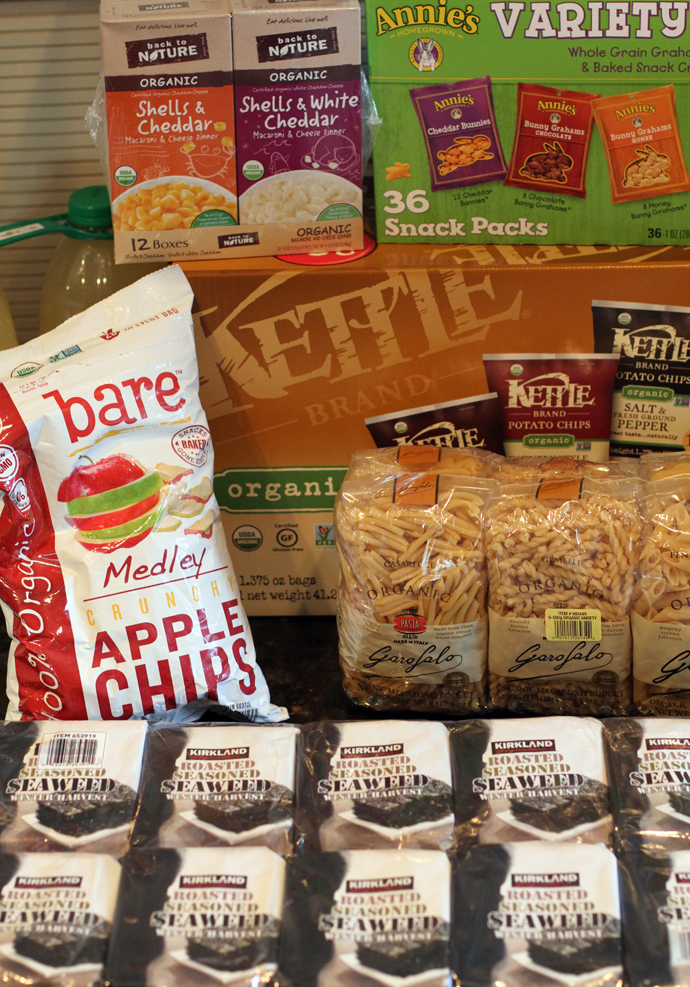
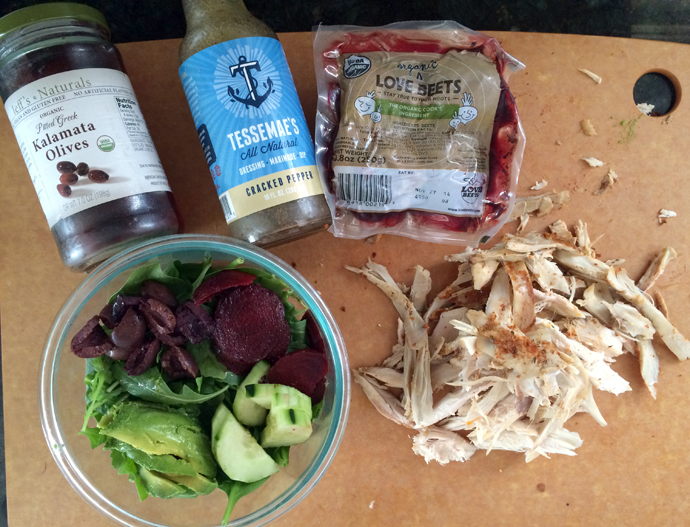
Get a few convenience items to make your life easier. You will be cooking and cleaning a lot, and you’ll get annoyed and tired if you try to do everything yourself. I went through 2 bottles of Tessamae’s dressing during this cleanse, as I was putting it on all my salads and marinating chicken in it on the days I was too busy to whip up an elaborate detox meal. I found a bulk package of beets for example, to add to all my salads to make them feel fancier and so I wouldn’t get sick of eating salads.

For afternoon drinks, signing up for the Aloha pack was a lifesaver because I would just add a pack to water or a Suja juice or even almond milk, and drink it on the go.

MEAL PLAN! Plan out your meals each week and shop accordingly. This isn’t something you can just do flying by the seat of your pants. Fighting cravings and giving up some of my favorite things was made much easier knowing that I had a good meal coming at me, just around the bend.  thriving-on-a-detox3

Lastly, I just want to say that this is a serious process, as in, it’s pretty dang strict. Even Whole 30, one of the more strict programs out there, allows for eggs and red meat. I don’t recommend anyone to try this if their current diet is on the other extreme of healthy. Not to say everyone couldn’t benefit from something like this, I just think it would be really, really hard. I know how to read labels now, what to look for, and for the most part, how to cook this way. My prior familiarity with this way of eating and cooking allowed me to not feel chained to a meal plan, allowing me to feel more flexible. My taste buds, I think, have also changed so that I love the taste of fresh green juice and I’ve learned to love the tastes of food with limited additives. I think if I didn’t have this prior knowledge, and I was still eating a lot of “junk”, it would have been much, much harder for me to stay on track. I don’t say this to try and dissuade anyone from a cleanse of some sort, but just consider you may want to start a little smaller, something like we did during the 30 Day Challenge.

I can’t tell you how good I feel compared to just a few weeks ago. Perhaps because I was feeling so lousy, the results of the cleanse are even that much more remarkable, so please don’t be disappointed if you don’t seem to feel as good as I do, in comparison to pre-cleanse. At the very least though, you’ll improve your health in the process, and see what you’re made of 😉

Oh, and did I “cheat?” Yes, I did; twice. Two weekends ago I went out to dinner with my brother, sister and our spouses and I called the restaurant ahead of time to get a lay of the land. They were happy to make ingredient accommodations for me. But I drank a beer with a 4% alcohol level, had a glass of wine, and then later, had a wine flight, all over the course of 4 hours. I can’t remember being so sick you guys. I threw up several times and regret it so much. It was pretty obvious that my tolerance was already lowered. Along with the fact that I hadn’t had any substantial oil or carbs during dinner, it was a recipe for disaster. And this past Saturday we celebrated my friend Wendy’s birthday, and I had 1/2 a beer and couldn’t even finish it, nor did I want to.

I’ll keep you posted on the meal plan and in the mean time, please ask me any questions you may have!
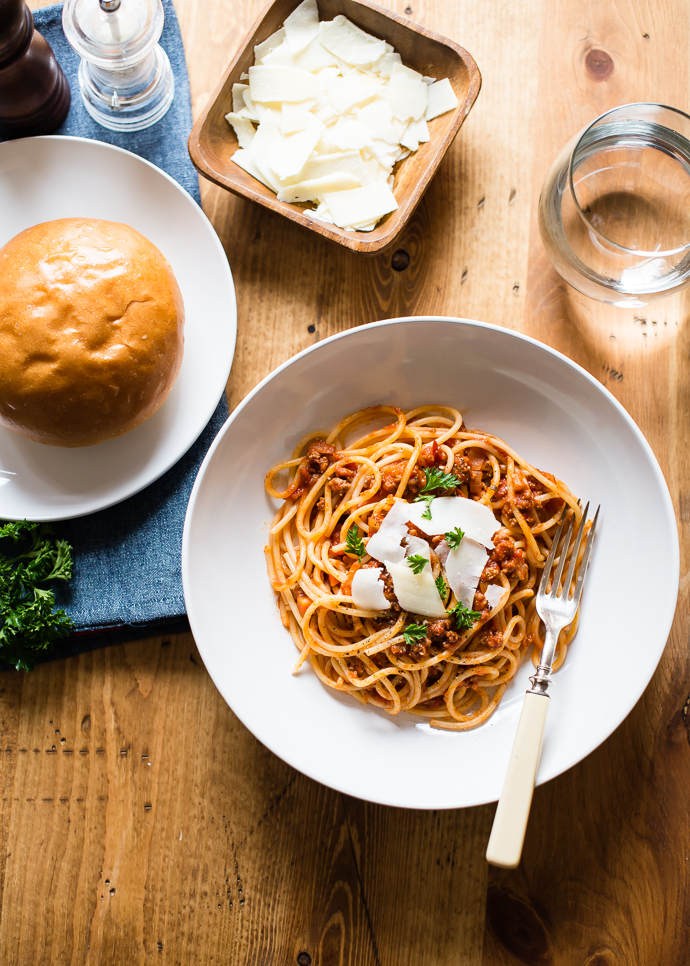


No Bake Lemon Macaroons

SHARE THIS +

IMG_7820 These little power balls, made with a bevy of awesome ingredients, are floating all over the internet and Instagram. After many of us stashed protein bars in our cars and purses for so long, we’re looking for an alternative that provides the same benefits of protein bars – filling, yummy and convenient – but without all the questionable ingredients. Lindsey shared her Carrot Cake Energy Bites a few months ago, and now a new version; No-Bake Lemon Macaroon Power Balls.  IMG_7636 I had to tweak with the recipe just a bit, but for the most part, these came together fairly quickly. Once you have a good understanding of what ingredients you need to make these little delights stick together; usually shredded coconut and some sort of nut flour or oats, you can then tinker with ingredients and come up with a variety of versions. These are light and refreshing,  but satisfy a sweet craving just as well as a cupcake, and they’re a nutritious little snack to have in the morning with some tea or in the afternoon when you need a pick-me-up.  IMG_7638 For these, you can use almond flour or hazelnut meal, but almond flour is much cheaper. Most health food markets, even Sprouts, sells almond meal/flour in the bulk bins, but you can make your own by just pulsing raw almonds in a blender or food processor until very fine. I suggest you start with the zest of 2 lemons, taste, and then add more zest if you want it tangier. I find that lemons range quite a bit in levels of tartness, and people’s preference differ as well. I personally love the extra tang, so if you’re like me, be bold and just start with 3 lemons.  IMG_7623 IMG_7642 You’re looking for a consistency that stays together easily when you smash it together with a fork. If it seems too gooey, simply add a bit more coconut or almond flour. Your hands will still get messy either way, so don’t be afraid to roll away, and maybe keep a dish towel on hand for the occasional hand wipe. IMG_7653 IMG_7666 Depending on how much you love coconut, you can roll these babies around in some more shreds, or not. My favorite brand of coconut is Let’s Do Organic Shredded, Unsweetened Coconut , as the taste of coconut is very faint, so it adds a hint of sweetness to recipes, without being overpowering like the fake stuff you get in the grocery store, which is too sweet and too strong. I may just buy it in bulk, as I use it so much in smoothies, power balls, my Nutty Baked Granola, and all sorts of baked goods. IMG_7664 , as the taste of coconut is very faint, so it adds a hint of sweetness to recipes, without being overpowering like the fake stuff you get in the grocery store, which is too sweet and too strong. I may just buy it in bulk, as I use it so much in smoothies, power balls, my Nutty Baked Granola, and all sorts of baked goods.

You can certainly pop these in your mouth right away, or put them in the fridge to firm up for about 30 minutes or so, and I personally think they taste even better. These hold up in the fridge, stored in a covered container, for at lesat a week or two, but guaranteed they won’t last that long.

All photos by the lovely Claire Paice. 

No Bake Lemon Macaroons
 
Prep time
Cook time
Total time
 
No bake lemon macaroons
Author:
Recipe type: Snack
Serves: 4
Ingredients
  • 1 cup finely shredded unsweetened coconut
  • ½ cup almond flour
  • 3 tbsp melted coconut oil
  • zest of 2-3 lemons
  • 2 tbsp pure maple syrup
  • ¼ tsp vanilla
  • ⅛ tsp sea salt
Instructions
  1. Combine all ingredients in bowl, and work into small 1.5 inch size balls. Roll in a shallow bowl of unsweetened shredded coconut if desired. Place on parchment lined baking sheet and freeze or refrigerate for at least 30 minutes.


Week In Review

SHARE THIS +

swim-team-1 When I was a freshman in high school, I sort of became a bit of a wanderer. Trying to make new friends, seemingly falling into a group that my dad in particular, did not approve of. Nothing bad was going on, I was just in that typical teenage stage; moody, angsty, wannabe punk rocker. My dad sat me down one day and told me to find an extracurricular activity, or else. So I started trying out for sports, one after another. I had never done anything in all my youth, besides try ballet for a few weeks, and gymnastics ended with a fake injury.. I still remember my poor mom sitting with me in the ER for hours, waiting to get my elbow checked out, only to find that there was absolutely nothing wrong with me – I could have told them that. I was young and any time I got out of my comfort zone, felt like I couldn’t do something just right, or got to missing my mom during class, I would cry that I wanted to quit, and my mom gave in. I was never guided, or pushed into anything, therefore I never got good at anything.

So when high school came and I tried out in succession for all the sports, I inevitably failed miserably. My genetics gave me height, but I couldn’t shoot a basket to save my life, hated how much the ball stung my hand when I would set up a play in volleyball, and my swing in softball was pathetic. My best friend Rachel, who had committed herself to dance since we were 5 years old, was light years ahead of me, and I couldn’t pull off a split, so my hopes of getting involved in a different extracurricular activity besides sports, were dashed. As we went through the school year, with me trying out for each sport as the season came up, I had still not “found something.” Until Spring came and after failing to make the softball team, I tried out in the only sport that was left: track & field. While by no means was I a natural, I had long legs, and I could run, and so I did.

By my Senior year, I was no Marion Jones, but I could hold my own in my league, and I met a ton of friends, both guys and girls, and had built up a ton of confidence, running for student body office and getting involved in other clubs and activities at school. I was happy, and because of that, my parents were happy. By all accounts, I was a well-adjusted teen, with a good group of friends and too busy with sports and activities to get in trouble. While I hated my dad that day he sat me down and told me to find something, thereby subjecting me to countless hours of humiliating try-outs, I was happy in the end, that he had done that. If only they had pushed me more before, who knows?

We’re given so many mixed messages as parents today, aren’t we? Keep the kids active because they’re in front of the screen too much; don’t over-schedule, kids need time to be bored; don’t push them; we here in America push too much. It’s confusing and annoying and, unless you live in a vacuum, even the most steadfast of parents can sometimes question their course if they let in too much of the noise. In the beginning of this parenting thing, partly due to the parenting circles I was running in at the time, I fell into a little bit of the mindset of not pushing, letting the kids guide themselves, allowing them plenty of time to just be bored. Of course I understand all of that, and through those countless hours of doing nothing, I think we’ve turned out some fairly creative kids, but there comes a point when we you just have to follow your gut and know what’s best for your kid. swim-team-2

This week Taylor began a new swim team. It’s somewhat demanding, at least a big jump from her previous team, and requires 2, 2 hour practices each week, each with 1 hour of swim practice and 1 hour of “conditioning” on the beach, which includes running drills, sit-ups and push-ups.

After the first day of practice, she wept the whole way to the car, moaned the whole way home, and continued to cry off and on till bed time. Lots of talking was involved, most super positive, with just a tinge of annoyance, and at one point talk of the Navy Seals was brought up, along with discussions of personal sacrifice and dedication. Let’s just say, it was a long night.

The bottom line, we’re making Taylor stick with it, and mainly because I think she would greatly benefit, as most kids would, from the hard work, and the good feelings that come along with the dedication it takes in becoming good at something. I don’t want her to be the best at swimming, or go after Olympic dreams. She’s already a great little swimmer, and if she gets better, has fun, and learns a little bit about the work that goes into reaching the next level, I can’t help but think she’ll turn out better for it. And by the second day, she was already admitting that her new swim team wasn’t all that bad. swim-team-3

This new schedule has us out of the house more than before, and while we will still be home in time for dinner, the act of making dinner definitely needs to be done in advance, or else we’ll all be eating at 8 o’clock at night.

Enter the slow cooker. Ours we’ve had for a whopping 16 years, and it’s still going strong, although I secretly wish it would die because it’s the ugliest crock pot ever made. This resurgence in crock-pot cooking made me reach for some new cookbooks. I already own Fix and Forget It, which is totally traditional crock-pot fare. I recently thumbed through it, hoping to find some recipes that would help me out, but also follow the general guidelines of our new way of healthy eating. Let’s just say, some vegetarian recipes called for chicken or beef stock, and many, many recipes call for condensed soup.

I had America’s Test Kitchen’s Slow Cooker Revolutioncookbook a while ago, but it got ruined when a bottle of water got dumped on it. From what I remember of that book, all the recipes were delicious, as ATK takes painstaking measures to ensure all their recipes are top notch, but they involved LOADS of prep-work, which sort of defeats the whole purpose of the slow cooker. So I set out to find some new cookbooks last week, and these are the ones I ordered:

Slow Cooker Revolution Volume 2: The Easy Prep Edition This version promises to take much of the extra prep work out of the recipes, with prep work guaranteed to be 15 minutes or less. If this is true, I know this will be a winner, because anything the AMT does is amazing, and usually pretty “healthy”. So excited for this one!

Where Slow Food and Whole Food Meet To be honest I’m a little nervous about this one, since there aren’t any reviews, but I figured I’d at least thumb through it and return if it doesn’t look awesome, although it does sound right up my alley, so hopefully it will be a good one.

The New Slow Cooker I actually picked this up at Barnes & Noble yesterday, as I had gift cards from Christmas to spend and it really caught my eye. The recipes, like the original AMT slow cooker revolution, do require prep-work, but they all look and sound so good, I thought I’d try it for the days when I had a little more time. This is more of a “specialty” cookbook, not because the recipes themselves are overly complex, but many of them call for fancy, although yummy sounding, relishes and side dishes. Their whole angle with this book is that slow cookers do a great job at adding convenience to our lives, but sometimes the meat or veggies look a little sad. They offer advice in here on how to fix that; with certain techniques and by adding those “fancy” side dishes. I already have put 2 recipes on the menu for this week and will let you know how they turn out.

There are a few others I was eyeing, but I think I need to stop here, as there is no way I’ll ever be able to cook everything out of all the cookbooks I already own! But by all means, please share any other good ones you’ve tried or have heard about, as I’m sure we can all benefit from more books to add to our wish list 😉


Shopping For Real Food At Costco

SHARE THIS +

IMG_7326 I can’t help but think of one of our favorite, supremely stupidly funny movies, Idiocracy, whenever I shop at Costco. It’s that en mass, everything in bulk warehouse idea, that conjures up images of flats of Coke and huge boxes of Doritos and other junk foods. But I love Costco all around; for their affordability, their awesome company values, including paying a living wage and staying closed on turkey day, and the fact that for the most part, they listen to their customers. They also keenly watch trends in the marketplace, and for the past couple of years, before I even began to pay much attention, they started bringing in more and more organically grown produce, natural products and even grass-fed meat. Even though I make it a point to try and support local farmers and farmer’s markets as much as possible, Costco, especially for a family of 5, is a fantastic way to shop and save money, and as it turns out, even a great place to shop for real food.

I definitely have a method to how I shop Costco now, and although my cart looks a lot different than it did a couple of years ago, I still manage to spend about the same amount of money there. Each time I post a photo of my cart on Instagram, readers are amazed at what the offering is. So today I thought I’d share some tips on how I shop, what I look for and what I generally tend to buy only at Costco.

Most Cosctos are generally arranged the same way, with the somewhat non-perishables on the outer perimeter, refrigerated items including meats and frozen items in the center, as well as snacks and clothing, books, and other novelty items.

The first thing I do when I enter our Costco, which is in Cypress, California by the way, is walk the outer perimeter, starting with the bread section. I buy either Dave’s Killer Bread or Alpine Valley. Next to the bread section at my Costco, are the bulk chips and snack bags of chips, so I will see what’s new and usually either get Skinny Pop, Angie’s Popcorn, or Kettle brand organic potato chips. And fine, I also pick up some wine and a case of beer too, since alcohol is right next to the chips at my Costco. IMG_7333

I then make my way towards the meat and refrigerated section. Items I always buy here are cheddar cheese, either Kerrygold or Tillamook, and I only buy our Kerrygold grass-fed butter here, as it is hands down the cheapest place to buy. I’ll see what they have in terms of fish that day, and if they have something wild and from the US, I’ll pick some up. Depending on my current inventory at home, and if I’ll be making it to another market soon, I may or may not pick up the organic chicken breasts they sell there, as they’re perfect for making chicken nuggets. But most of my chicken comes from either local places or Mary’s. I used to buy the grass-fed ground beef there too, but since I belong to a beef CSA now, I have plenty of local grass-fed beef. These organic chicken sausages were awesome and contained no added sugars, although I haven’t seen them back since buying them last month. And the Kirkland wild caught smoked salmon is so good! IMG_7335

Next to our refrigerated section, is our produce. I don’t buy a ton of produce at Costco, since we have great farmer’s markets and belong to a CSA, but I do love certain things from there and I swear they are the best. Watermelons, grapes, and cantaloupes are always perfectly sweet. They usually have some organic boxed greens I’ll pick up, and their organic 10 lb bag of carrots is a great deal, although since we got rid of our 2nd fridge, I can no longer fit them in our single fridge. The great thing about Costco is their produce is not only marked country of origin, as required by law, but because it all comes packaged, the farms and cities are usually noted on their labels as well. When produce is in season, I’ll notice that the majority of it always comes from somewhat local, California farms, so I happily purchase. Once fruits and veggies move past their season, then I’ll start noticing their origin is usually out of state or out of country, then I’ll usually skip it, unless it’s something like bananas, which you can only get out of country. The whole shopping local thing is all personal, but just wanted to share how I try to stay mindful of this, even when shopping at someplace like Costco.

Next to the produce section I visit the frozen section and if we are low, I pick up bagged organic berries, perfect for smoothie making, and a great deal. They also sometimes have things like frozen wild caught salmon, frozen organic brown rice, and a few other novelty items, but the prices on those aren’t particularly stellar, so I try not to waste valuable fridge and freezer space on those bulk items.

Drinks border our freezer and refrigerated section, so I’ll see what they have. My husband has grown addicted to Honest Tea, in his quest to kick soda, so if it’s on special I’ll pick up a case. I buy a case of organic drink boxes every few months for when we have play-dates and to put in the kid’s lunches on occasion, but mainly we just send them with water. I noticed last time that they even began carrying organic lemonade made with organic cane sugar, and it was a great price. The kids loved it. IMG_7322

The bulk foods section is where I really do some damage. There are several items in this section that I only buy at Costco, including organic maple syrup, organic olive oil, organic peanut butter and some organic grains. I always browse up and down these aisles to see what’s new, and will almost always find new or old grains to try, including quinoa and rice, oatmeal, pastas and even flaxseed meal. Since I make my own stock now, I no longer buy the Kirkland organic chicken stock, but when I did, it was always great and a good value.

Before I head out to check-out, I visit the snacks section. This is where the best ever baked apple chips are located, which only have 2 ingredients; apples and cinnamon. I occasionally buy other little packaged organic snacks, and also get Taylor the packages of seaweed, but for the most part, stick with simple. When I bring anything into the house that comes in a little package, the kids go nuts for it and I practically have to lock it up.

If you skimmed through this list, the main things I only buy at Costco include Kirkland organic maple syrup, which we use as a sugar replacement in most recipes now, Kerrygold grass-fed butter, Alpine Valley organic bread, Kirkland organic peanut butter, and Kirkland organic olive oil. These products are all great and very affordable in bulk in comparison to purchasing at a regular store.

My main advice at Costco is to not get overwhelmed, walk the perimeters and get familar with the store, and if oyu don’t see enough orgnaic or natural food options at your Costco, speak to your store manager.


Nutty Baked Granola

SHARE THIS +

Nutty Baked Vegan Granola

I’ve been making Gwyneth’s simple 3 ingredient granola for over a year now, and interchanging quinoa and oats on a rotating basis. The kids love the simplicity of the oats version, and I love the earthiness of the quinoa version, and while the age old motto “if it ain’t broke, don’t fix it” usually runs true, I did feel like adding a little something-something to our typical plain granola, and so made this one. Plus, it seems that the plain granola goes a lot quicker, and having some add-ins helps to stretch the quantity out much more.

Truth be told I haven’t tasted a whole big chunk of this lovely stuff yet, since it does have sugar, but I did taste a pepita just to make sure it baked up well, and the little nibble I got was amazing. The kids are loving it too, and have been serving it for breakfast, as well as packing it in lunches alongside a little dipper of yogurt.
Nutty Baked Vegan Granola
To get nice big chunks, follow the same method I use for the quinoa granola, and gently press it together and down on the baking sheet, so that it forms together in one big piece. Then, when done baking, you simply break off big chunks. Of course some chunks will crumble into little pieces, but that’s okay.

Since many granola is made with butter, which requires an additional step of melting on the stove, I decided I wanted to stick with the idea from It’s All Good, of using olive oil in place of butter, which can easily be whisked with your sweetener, requiring no additional heating steps. One less thing to do is always nice in my book. Plus, using olive oil instead of butter makes it perfect for vegans, or those trying to watch their animal product intake.

Can’t wait to dig into a big bowl of this stuff soon! Baked Granola

Nutty Baked Granola
 
Prep time
Cook time
Total time
 
A versatile recipe that can be made using a variety of add-ins, is vegan friendly, and can be gluten-free. Recipe adapted from 100 Days Of Real Food.
Author:
Recipe type: Breakfast
Cuisine: American
Serves: 8
Ingredients
  • 3 cups rolled oats or quinoa flakes, if sensitive to oats
  • 1 cup raw cashews
  • ½ cup raw pepitas
  • 1 cup unsweetened shredded coconut
  • 2 tsp ground cinnamon
  • 1 tsp ground ginger
  • ½ tsp ground nutmeg
  • ½ tsp ground cloves
  • ½ cup maple syrup
  • ⅓ cup olive oil
  • 2 tsp vanilla extract
  • sea salt
Instructions
  1. Preheat oven to 250 degrees and line a baking sheet with parchment paper
  2. Mix all dry ingredients in a large mixing bowl
  3. Whisk olive oil, maple syrup and vanilla in a separate bowl
  4. Combine the olive oil mixture with the dry ingredients and stir to combine
  5. Spread onto the baking sheet, pressing down so that the granola sticks together
  6. Bake for 60 to 75 minutes
  7. Allow to cool, and break granola into small and large chunks.


DIY Geometric Necklace

SHARE THIS +

Geometric necklace DIY

In the summer heat I always find it a bit of a challenge to accessorize. Daunting a scarf is no-go in 101-degree temperatures. Bulky jewelry also starts to feel heavy and uncomfortable. For this summer I wanted to craft a couple quick and easy pieces of jewelry that I could wear with lots of outfits so I made this DIY geometric necklace that was so light-weight I forgot I was wearing it! It’s also very fashionable, neutral, and just overall very cool.

What you will need:

Geometric necklace DIY

– 1″ to 3/4″ wood blocks

– a drill with a drill bit big enough to fit the end of your necklace through it

– painters tape

– craft paint and a paint brush

– a necklace chain

Geometric necklace DIY

Step 1: The first step is to turn those cute little wooden blocks into beads. To drill a hole, I firmly held the block against a piece of scrap wood and drilled a hole completely through the block. For each of the blocks I drilled the hole in at a different angle so that each bead hangs at a different angle on the necklace.

Geometric necklace DIY

Step 2: Next, I wanted to add some simple details to each bead. I taped off sections of the bead at funky angles using painters tape.

Geometric necklace DIY

Geometric necklace DIY

Step 3: Then, with craft paint, I painted the taped off sections of the bead. A couple coats of paints did the trick.

Geometric necklace DIY


Step 4: Once the paint completely dried I removed all the tape, revealing clean geometric lines that make each bead unique and interesting.

Geometric necklace DIY

Geometric necklace DIY

Step 5: For the final step I simply strung the beads on my necklace chain!

Geometric necklace DIY

Geometric necklace DIY